data-animation-override>
“3D printing is here to stay and — although there’s more involved than simply pushing the ‘print’ button — it’s even possible to ‘print’ your very own classic car”
As the average consumer prepares for the new — albeit complex and expensive — wave of 3D printing technology, businesses, enthusiasts and individuals have already found some interesting and challenging uses for this newly developed equipment.
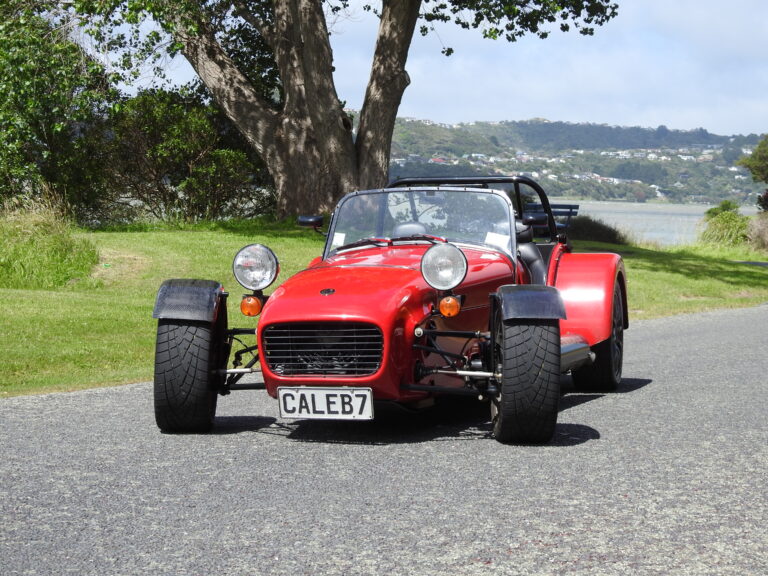
Some may ask how this relates to the classic car hobby, but for Aucklander Ivan Sentch, 3D technology is very much an integral part of his Aston Martin DB4 project: imagine a fibreglass body on a bespoke space-frame chassis fitted with mechanical components from a donor car.
Push print
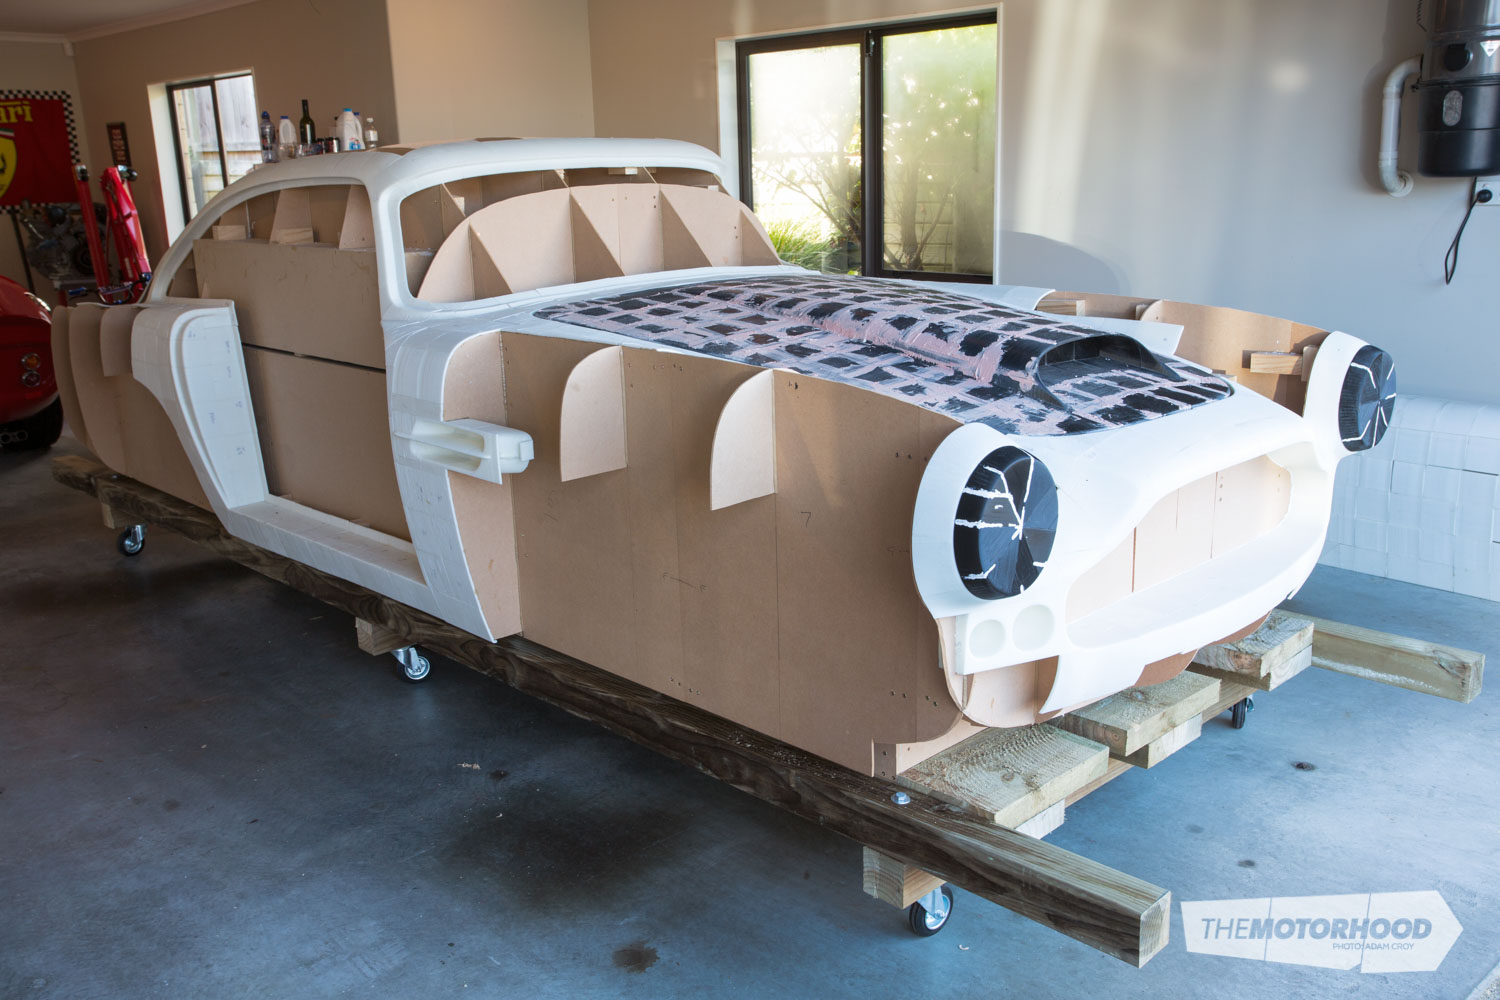
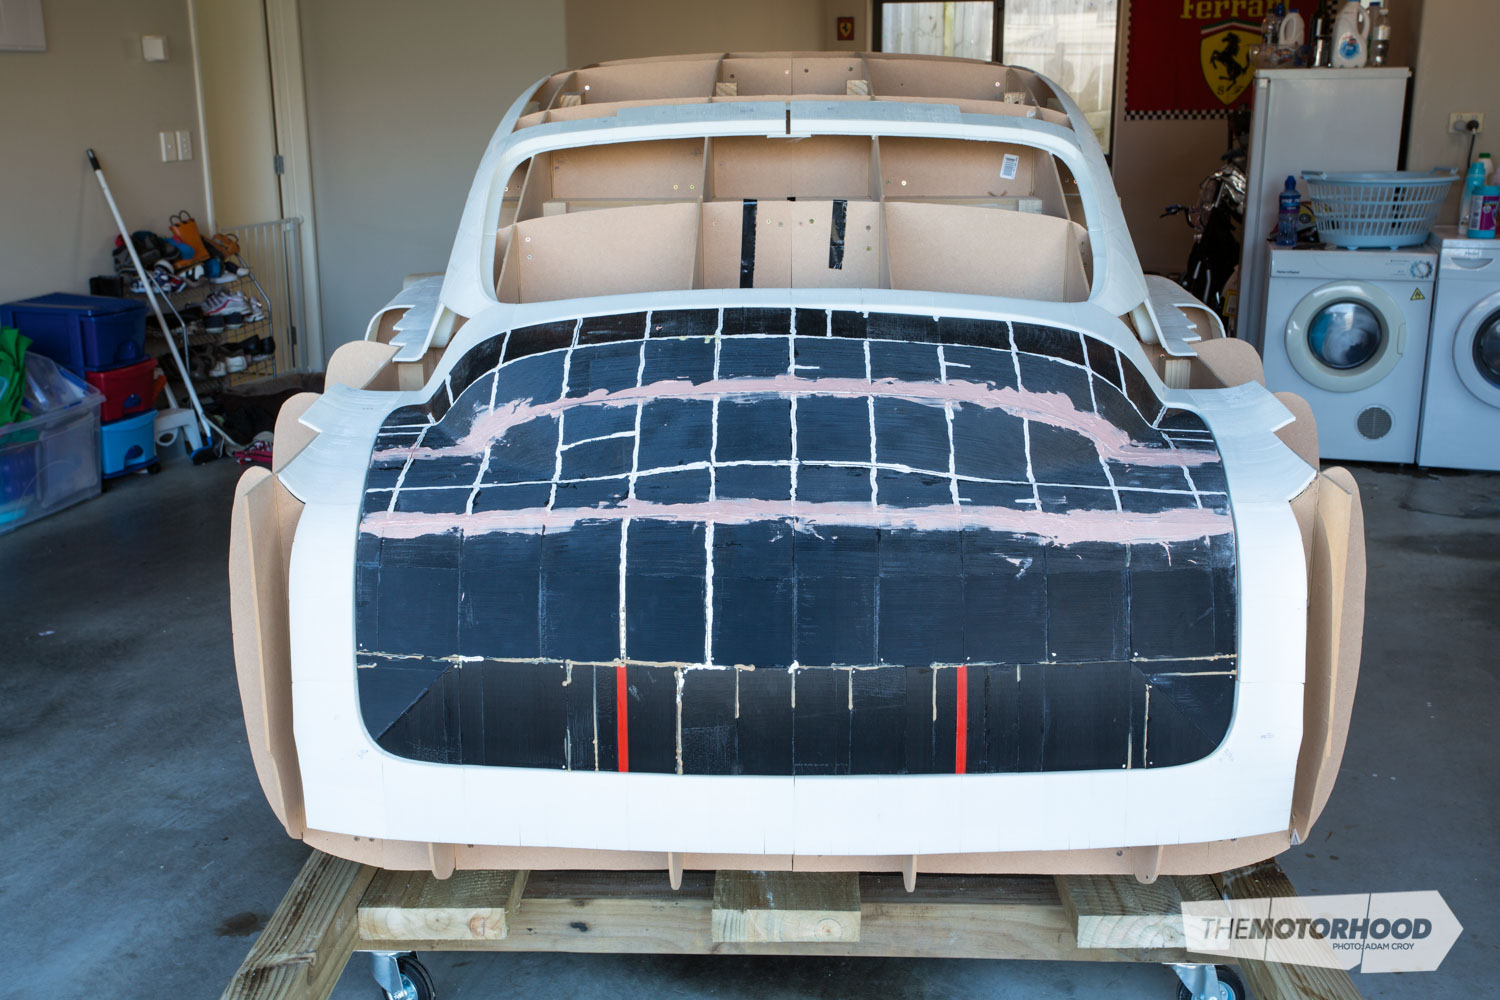
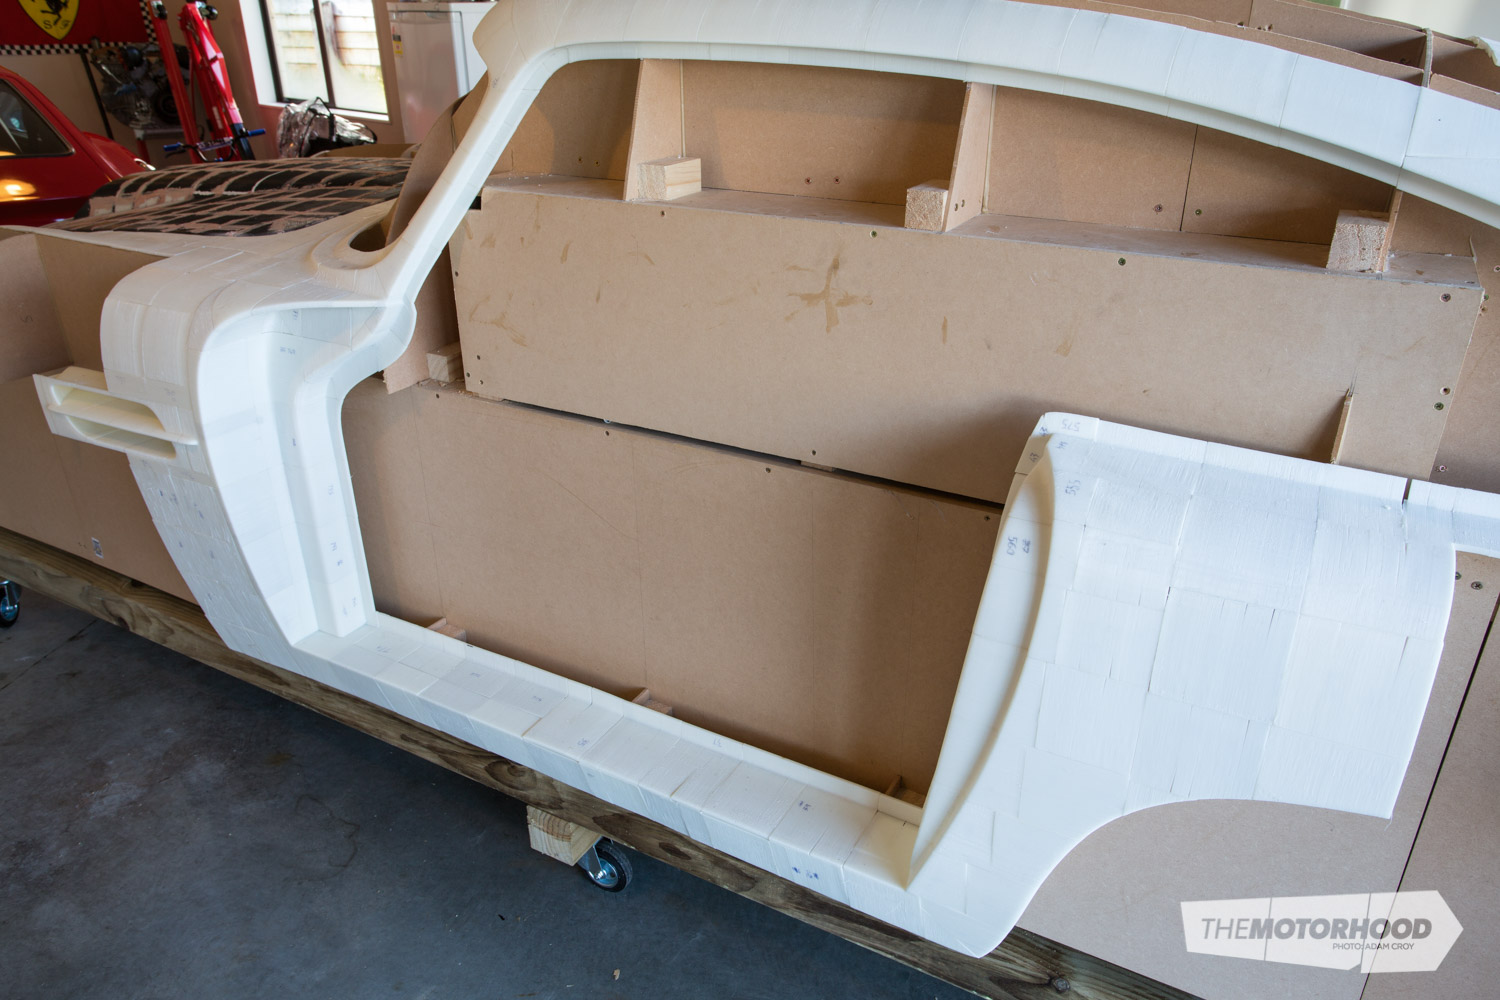
At the moment, Ivan is preparing the plug that will be used to make an Aston Martin DB4 mould. He investigated a couple of alternative methods of producing this based on what he could comfortably achieve himself. The first (and easiest) was to get it cut out of foam by a local CNC mill. That would cost anything between $12,000 and $15,000, which Ivan thought was too expensive, considering the former gets thrown away when he’s finished with it. The next idea was to make a framework or buck, fill it out with foam sheets and manually sculpt the exterior body shape — a laborious exercise that Ivan decided would involve far too much work. This process would also be even more expensive than his third and chosen option, 3D printing individual components. This also allowed Ivan to print the bonnet, doors, boot and dash separately instead of just having a shell.
In order to achieve his goal, firstly Ivan purchased a 3D CAD drawing of an Aston Martin DB4 online — according to Ivan, this looked reasonably correct. The next step was to make a few slight modifications to areas including the flanges surrounding the windows, boot and bonnet guttering and the doors, which required major surgery, as the inside shapes just wouldn’t work in the real world. Once the modifications were complete, the next step was to slice up the entire drawing into suitably sized pieces for the 3D printer.
This was a fairly challenging exercise, to say the least. Ivan had to experiment with the bonnet drawings until he eventually got something that would work successfully.
Print out
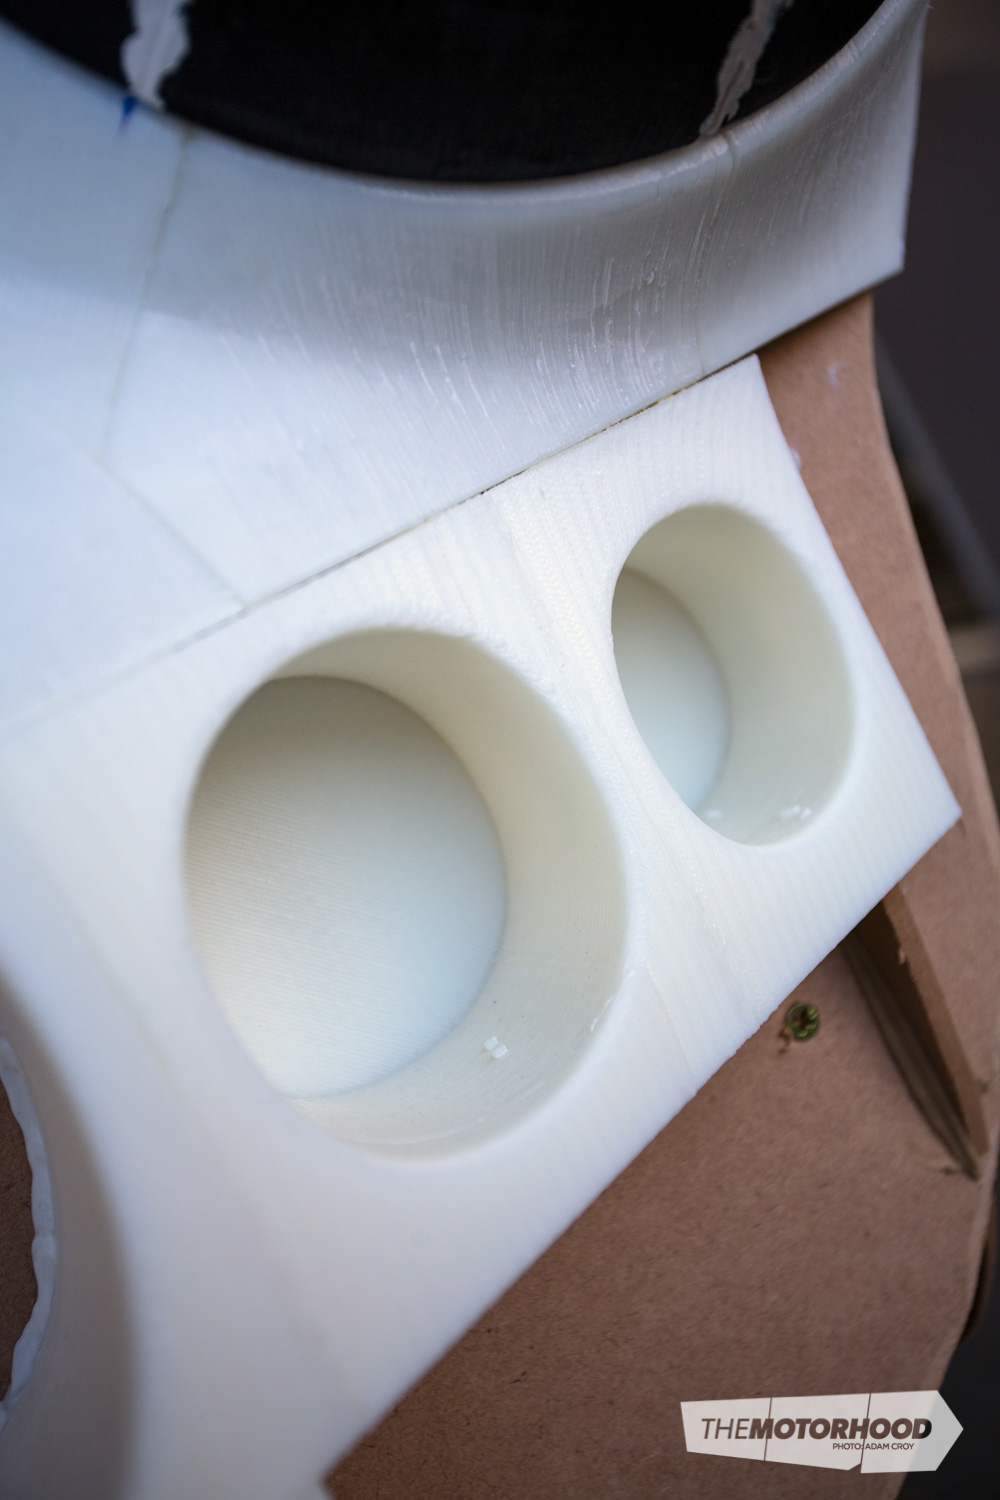
His first attempt was too large for the 3D printer’s print envelope, the second time it fitted but the overall idea wouldn’t work (the biggest challenge with ‘slicing’ is figuring out if the printer can print it, i.e. it can’t print on thin air, and requires a 45-degree angle). A third attempt worked, but it took a while to figure out how to best set up the printer to limit failed prints. The biggest cause of failed prints is when the bottom peels off the bed, which is caused by the contracting forces between the cooling plastic and a glass bed that’s heated to 95 degrees. Using Kapton tape (a special polyimide film capable of withstanding high temperatures) and hairspray has reduced the failures to less than one per cent.
Ivan figured that the best size for the sliced sections was 105mm by 105mm, any more and the prints (which are only 5mm wide) fall over. He can usually fit five individual slices in one print job, and estimates there are about 500 print jobs (so 2500 pieces all up) to complete the final plug.
To date Ivan has printed and assembled the boot, bonnet, and doors plus about 80 per cent of the body, and he just has the dash to complete after that.
Once all the 3D printed pieces are printed and assembled the next step is to apply a layer of body filler, sanding it back again and repeating that until it’s all smooth and true, then sanding back with progressively finer sandpaper (400, 600, 1000) until it’s glassy, then applying a mould prep and sanding everything back again with 1000 grit.
Once that’s all complete, Ivan will be able to make a fibreglass mould and cast a fibreglass Aston Martin BD4 body.
Print ready
Ivan is planning to use a Nissan Skyline GTS25T as his donor car, for a number of reasons. It has the correct wheel track (taking into account the Skyline’s wheels have a higher offset than the DB4’s wire wheels and knock-on adaptors), which is important, as you can’t get modifications to standard car-steering systems easily certified. Also, the Nissan’s in-line six-cylinder engine will sound right, and it’s the same engine he’s currently running in his Ferrari 250 GTO replica. As a side note, Ivan plans to fit a BMW V12 engine into this car that will provide him with a spare six-cylinder engine for the DB4 replica.
Apart from the drivetrain components, Ivan will also source other items from his Skyline donor car — such as steering, electrics, window mechanics, some hinges, latches and seats — all of which will require some modification before fitting into position. Ivan can then partially construct a chassis before sending it off to an engineer for final construction.
Once this is done, the body will be fitted to the chassis, and Ivan will complete the interior with ad hoc fibreglass panels (wheel arches, engine bay, floor, undercarriage, boot, etc.), before painting, upholstery and installing glass.
Ivan’s reasoning for replicating the DB4 over the more famous DB5 or DB4 Zagato (or any other car for that matter) came about for a number of reasons. He needed a car with four seats (the 250 GTO just doesn’t get used any more) and he has no interest in anything modern. Aside from that, it was always going to be a replica of an old Aston Martin as Ivan reckons they are just too cool, and he actually prefers the DB4 to other models. Because of that car’s bigger bonnet scoop, the simple fact is that is easier to reproduce and, in his opinion, it has better-looking headlights.
The timeline for this project is restrained by Ivan’s very limited free time now that he has toddler-age kids. However, that’s fine because a longer build will help ease budgetary constraints — though he hopes to have the project completed within five years. We can’t wait to see the finished product.