
Not as frightening as it sounds — in most classic cars, wiring looms or harnesses are quite simple
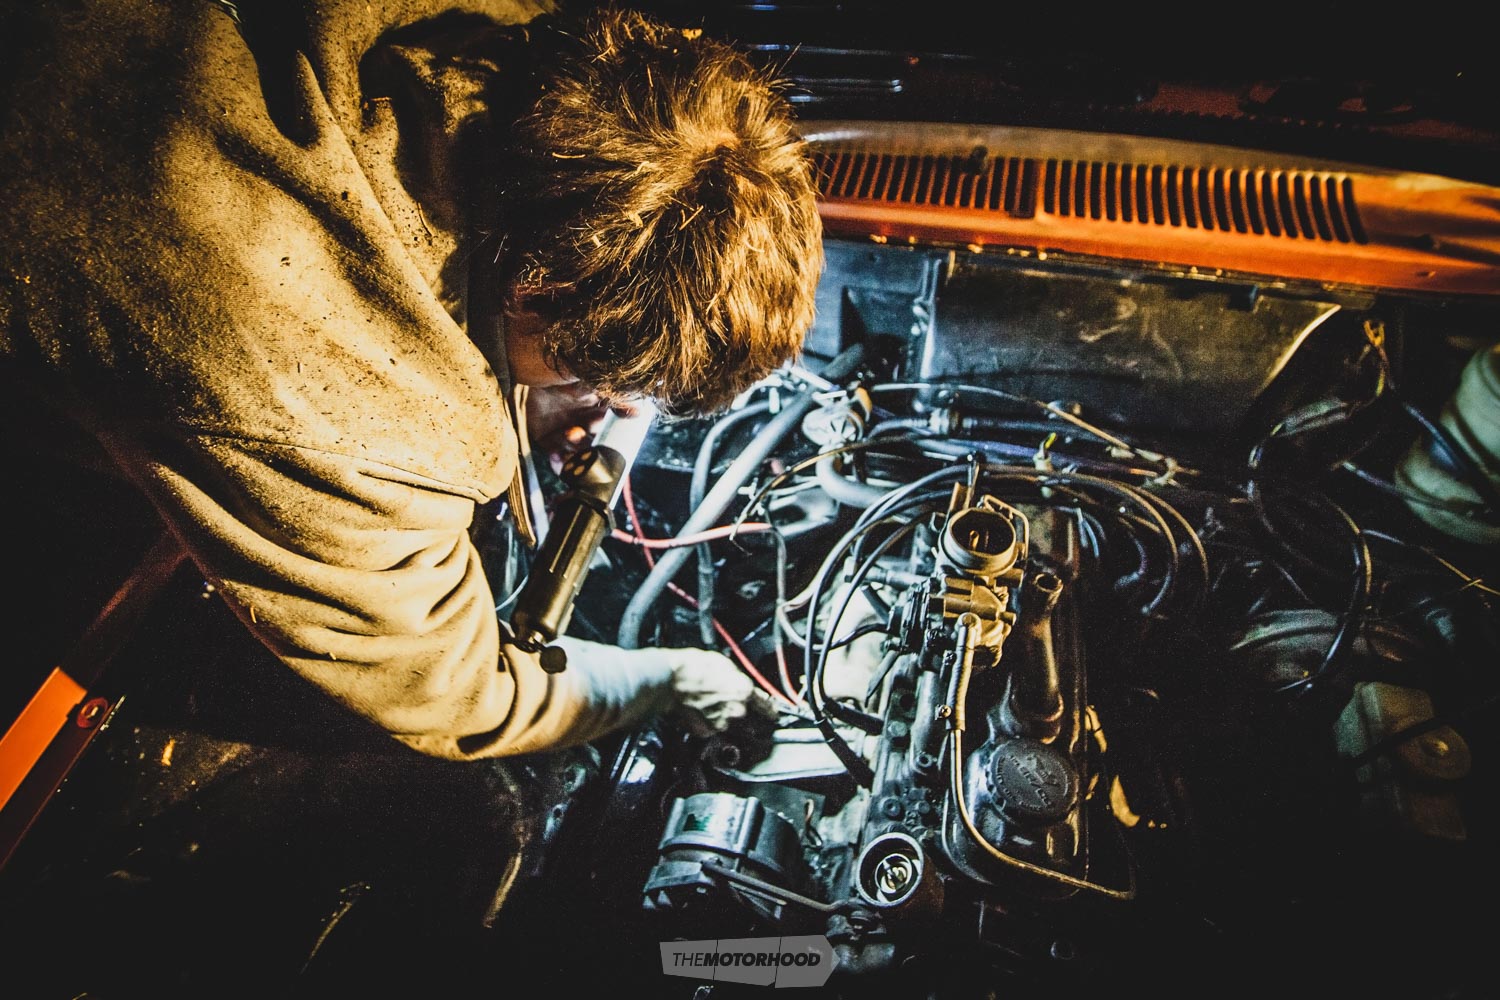
For many, automotive wiring is a black art. However, it doesn’t need to be. The principle is not complex: when electricity is put down one end of a wire, at the other end, hopefully, a tail-light will glow. On a modern car, it is slightly more complicated; the electricity starts at one end and then goes into a mysterious black box called a ‘computer’. Generally, if all the sensors are saying the right thing and all the planets in our solar system are in perfect alignment, a bulb will then light up. In some instances, the bulb’s intensity will vary depending on whether various sensors have indicated that it’s light or dark outside.
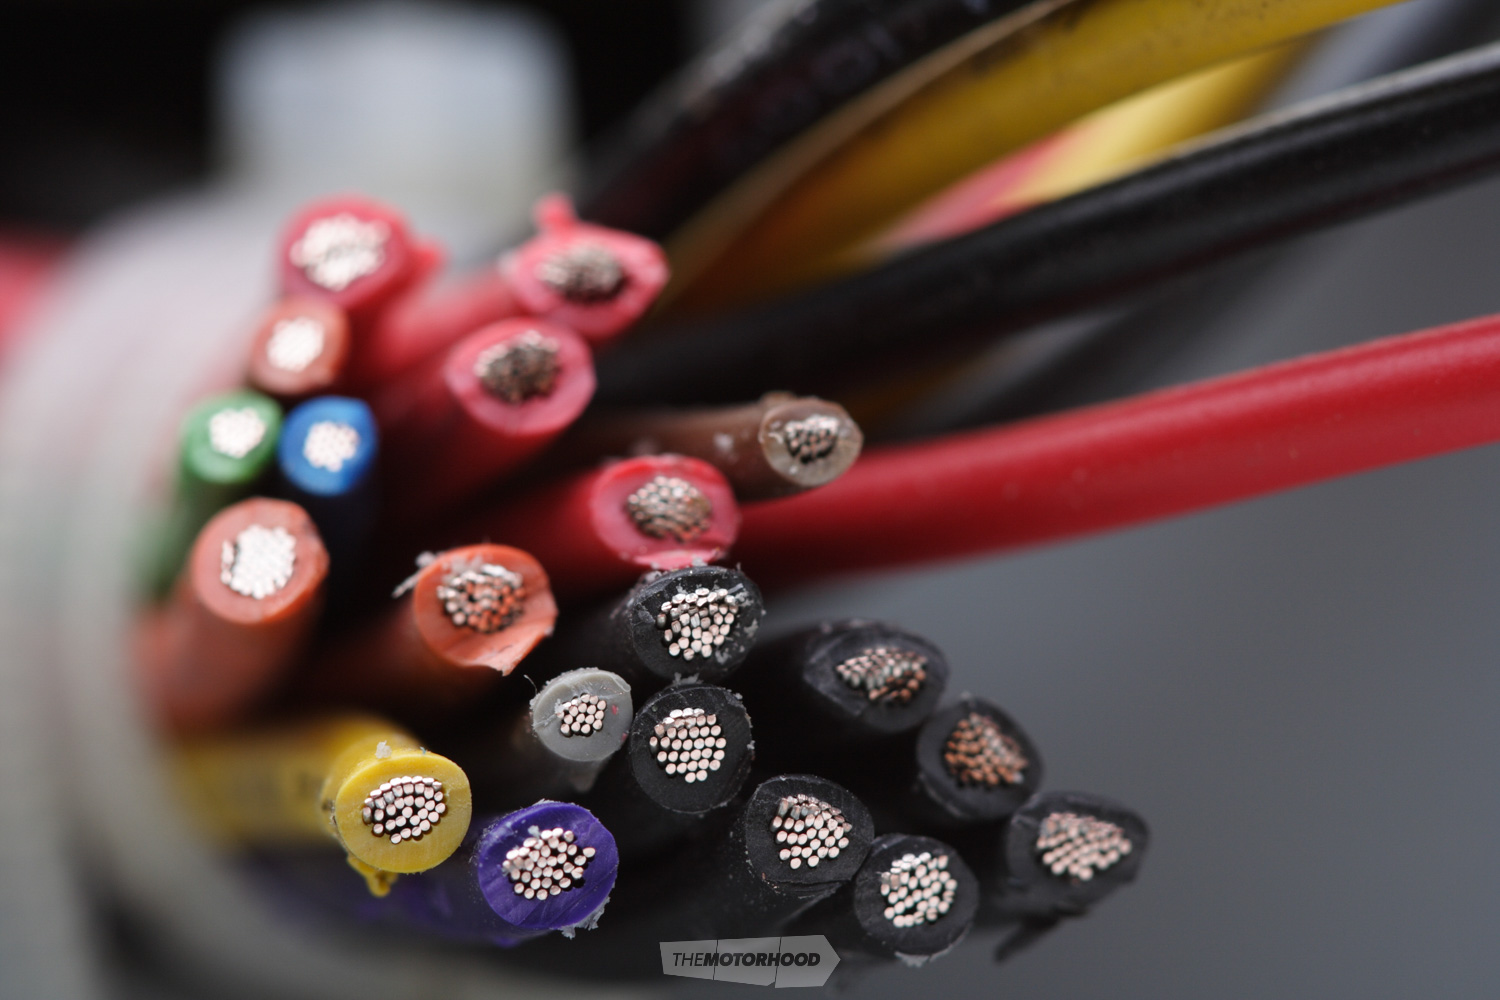
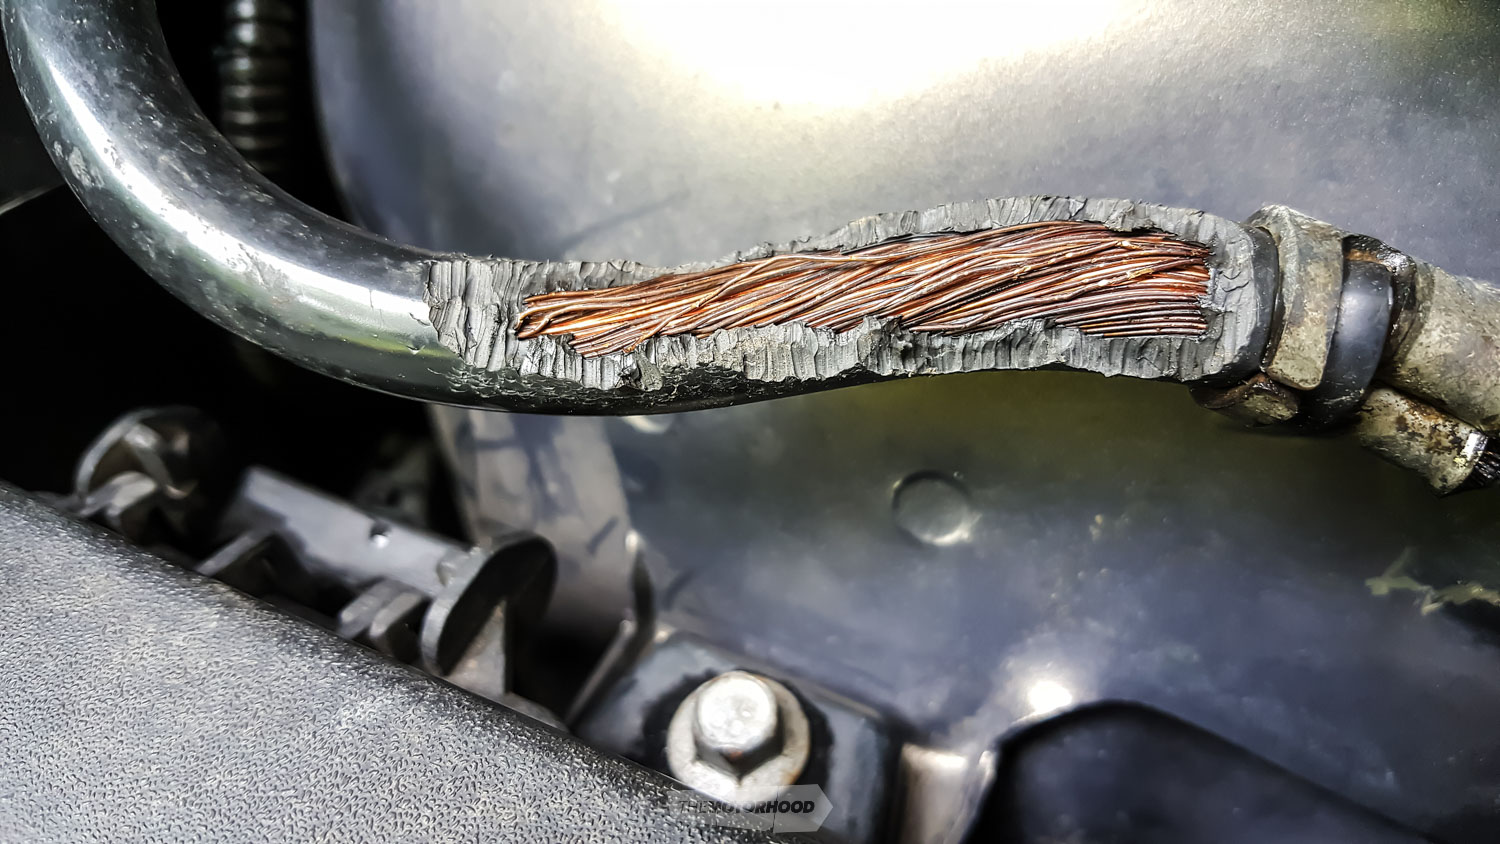
Fortunately, the bulbs in most classic cars don’t care what time of day it is, and there’s no computer to confuse the issue. This means that most classic car owners only have to worry about whether both the copper and the smoke stay inside the plastic sheathing. As long as both these items stay put, everything should continue to function quite normally. However, should you see either bare copper or smoke then you have a problem that needs immediate attention.
Mice and age are both exceptionally good at exposing bare-metal wire at a points in the car that are almost inaccessible. This can result in bare wires touching and smoke leaking out. Age, the main cause of wiring faults, will cause the plastic sheathing to harden, crack, and fall off the wire, exposing bare copper. A perished grommet that has fallen out will leave the loom rubbing on an exposed metal hole until bare copper is exposed. Electricity, being lazy, always takes the path of least resistance and will go to earth at that spot, leaving your bulb in the dark.
“I think modern connectors are just wrong in the engine bay of a vintage car”
So that’s how wiring itself can become damaged, but the associated connectors and switches are just as likely to cause problems. These too can break down, corrode, and fizzle out over the years, especially when a car is stored for long periods. Thankfully, most of the common types of switches are still available with limited searching required to locate them.
Simple spade-type connectors have little protection, so they also suffer corrosion from oxidation, just like poorly sheathed wire. In fact, when Jaguar did some analysis on the poor reliability reports on its XJs, it traced most faults to electrical connectors. These were replaced with new, better sealed multi-pin connectors on the XJ40, and reliability went through the roof.
P&B Group’s Paul Muldoon says that voltage drops from bad connections is still the most common problem on old cars, and, the majority of the time, the fix is simple. He says that there’s a vast range of replacement knobs and switches and connectors, especially Lucas and Bosch types, along with a wide variety of replacements. “The old-school style is readily available. It just depends on the look you are going for,” he says.
Paul says that more customers with older cars are now concerned with originality and replacing like with like. “Personally, I’m more concerned with functionality.” He reckons that modern connectors are cheaper and better. However, classic car customers will often come in just to get a tidy-up where they can see wiring that doesn’t look original. Whether wires are replaced end to end or just in sections will depend on the problem and what the customer wants. Wires running under battery boxes are prone to corrosion and can be replaced in sections.
Otorohanga Auto Electricks owner John Ryan says that problems come in all shapes and sizes. Faults with glass fuse connections on vehicles that have been sitting for some time can be common; sometimes, it’s corrosion on the fuse end caps, but the fault can also be with the fuse holders themselves. In general, he says, connectors are more vulnerable than plastic-coated copper wire, although cloth-covered cables don’t fare so well either.
John will use modern connectors that are more waterproof and corrosion-resistant on older cars, where it can be justified, but only if they are out of sight. “I think modern connectors are just wrong in the engine bay of a vintage car,” he says. John will reuse old connectors if they are up to the job, but, if they are too far gone, he makes new terminals and puts them inside old housings to keep everything in the right period.
Extending or repairing wires
If you need to repair a wire that is either broken or has become a heating element in a mouse bed for those cold winter nights, then don’t fall into the trap of joining the wire at the fault and then running it back to the fuse box or wherever it came from. This is generally not a good idea, and it’s much better to seek professional expertise.
After having installed three different engines in my car and extending the temperature-gauge wire three times with different pieces of wire that were lying on a shelf, I found myself unpopular when I took my car to the auto electrician to figure out why my temperature gauge was not working. At the time, I was not too worried which colour wire I used — I was after a quick fix. Apparently, it is very hard to trace a wire that changes colour three different times along its length with the fourth and correct colour being hidden under the loom wrapping on the other side of the engine bay. Well, at least that is what the auto electrician told me five or six times, and then twice more just to make sure that I understood.
If most of the broken wire is still in good condition, try to keep a least 300mm of the original-coloured wire at each end. That way, at least the colours will match up to the wiring diagram in the car’s service manual and/or make it easier to trace should another fault occur down the track.
Apparently, I’m not alone. P&B Group’s Paul says that it’s not unusual to see cars come in with problems after an owner has given up trying to fix it themselves. “We’ve had cases where someone has spent a whole week and damaged other pieces over a job that would have been a few hours for us and, say, $250 total,” he says, for example.
Naturally, he’s an advocate for leaving it to the professionals, but that doesn’t mean exposing yourself to unknown cost. “We help customers understand the cost of each step in the process before we start a job,” he says. “We’ll start a job and get to an agreed point, then call the customer to discuss the next step.” Paul says it’s important to P&B that the customer knows that they are getting quality workmanship and good value, and will leave happy with the finished product.
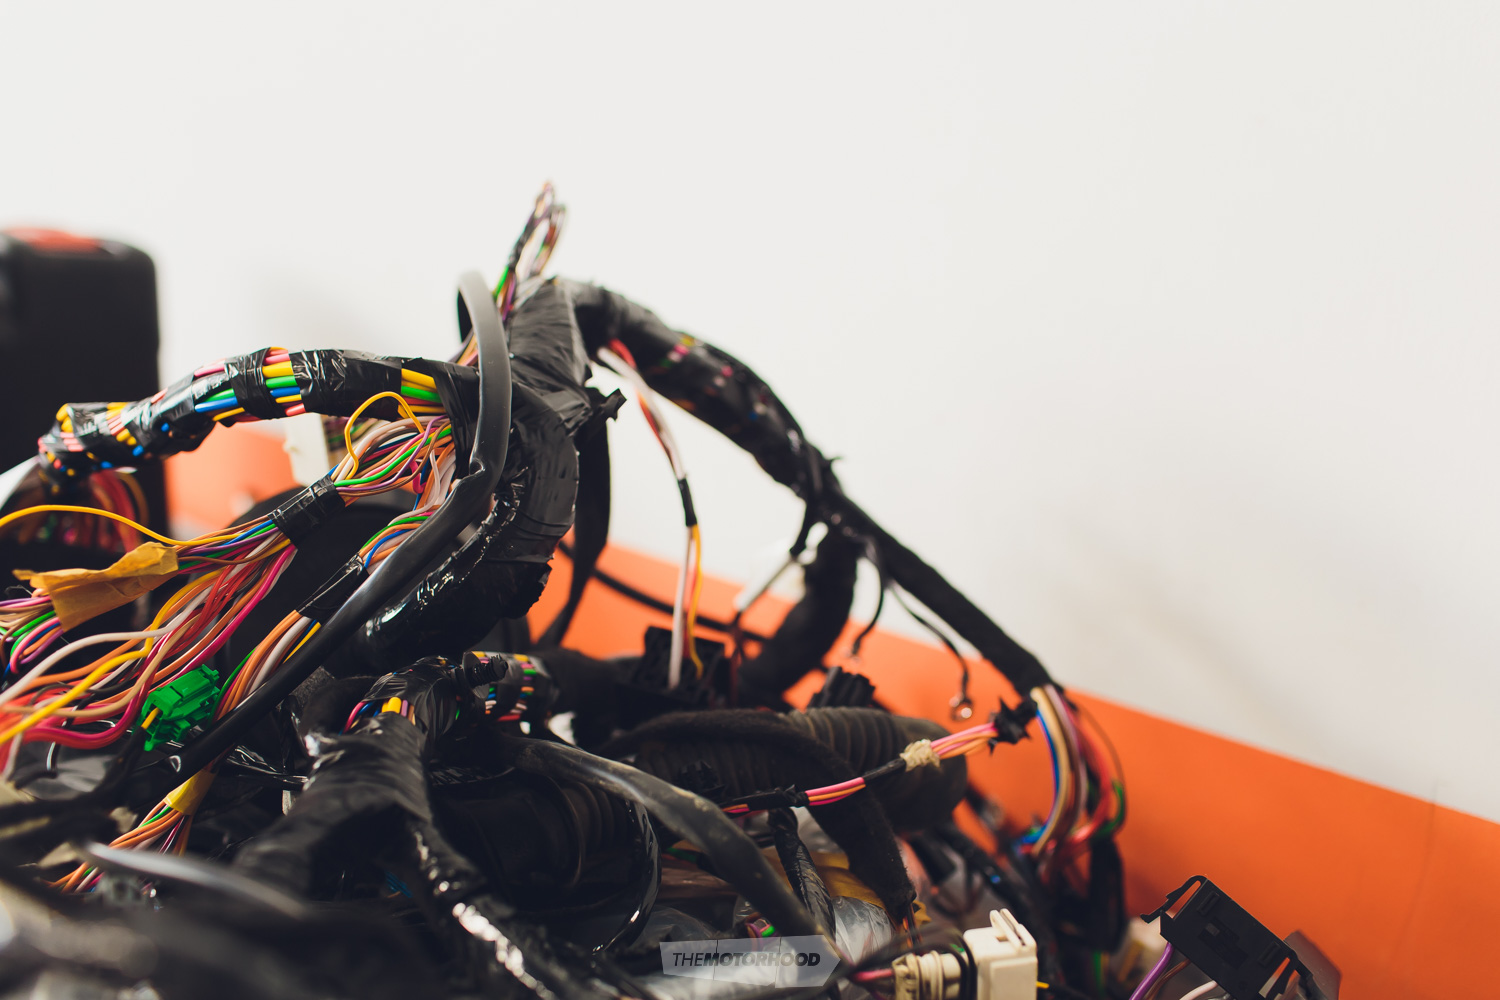
Old looms should be replaced
If the loom in your car has started to crack and you can see the plastic flaking off it, then the best thing to do is to replace it. Naturally, when you phone up your parts supplier, you will be told that the last complete loom for your model of car was sold just three days ago. If this is the case, then consider manufacturing a new one yourself. This is not a difficult process, especially if you are able to remove the original loom relatively intact. This will involve pulling the connectors apart — very carefully, as the plastic may have hardened and become brittle.
Next, stock up on enough different colours of wire of the right size or bigger. For many years, TVR wired all its cars using only black wire, differentiating the wires with a coloured tag at the end of each. Over time, these coloured tags have fallen off, much to the displeasure of many auto electricians, who have discovered that it is one thing to have a faulty black wire, but it is another issue altogether to discover which black wire that is. Auto electricians, as a rule, do not enjoy working on older TVRs.
John from Otorohanga Auto Electricks says that you can’t go too big on wire gauge. If you can get wire the same colour as the original, then all the better. “In theory, if you were to label every wire, every component, every piece; lay it out and use the same gauge wire, or bigger, then there’s no reason you couldn’t rewire a car yourself. It’s certainly easier to do on an older car with fewer electrical toys,” he says.
But there’s a ‘but’: “On older cars, there are very few that haven’t been played with before, and people tend to make a bit of a mess. In this case, if you were to copy a bad loom, it isn’t necessarily going to get you very far.”
A complete rewire will run into the thousands, but John says generic wiring looms of varying quality are available. Again, these can have problems with their fuse holders. He has seen cases in which 30A fuses simply couldn’t cope with that amount of current and melted rather than blew.
Before you start any work on the wiring, disconnect the battery; electrical shocks are always more entertaining for the people watching than for the person experiencing them. Once the loom is out, inspect every metal hole that the loom passed through. If a couple of grommets look old and perished, replace the lot. Places such as Supercheap Auto sell a range of rubber grommets for cars. If the hole is an unusual shape or size then try Para Rubber, as it has a range of clip-on-edge rubber trim sizes.
Laying out a new loom
To make a new loom, buy a large piece of plywood and pin the old loom to it. Make sure that you write on the plywood where all the connectors go, as this can save a lot of muttering and gnashing of teeth at a later date, paying special attention to labelling connectors such as the driver’s side tail-light and the passenger-side tail-light. What is obvious when you pull it out may not be so obvious when you go to put it back in some weeks later.
“In theory, if you were to label every wire, every component, every piece; lay it out and use the same gauge wire, or bigger, then there’s no reason you couldn’t rewire a car yourself. It’s certainly easier to do on an older car with fewer electrical toys”
Once the old loom has been pinned to the board, then, on a different board, put another set of pins in the same place as for the original loom. Using the old loom to get the correct length of the wires, start running new wires on the second board. To avoid confusion, build the new loom single wire by single wire and connector by connector. It is simply a case of running identical-length wires. Work through it one connector at a time. If you need to replace a tail-light connector, once you have attached the connector to the loom, attach its other half to the tail-light, avoiding possible confusion further down the track. If you are reusing old connectors, lightly sand or wire-brush all the copper connections shortly before reassembly.
If you have the original wiring diagram handy and need to use different colours of wires, write on the diagram what the new colours are, adding a key explaining what you have changed the colours to.
Windings are for the experts
There are a couple of other electrical items that usually only get attention when they fail. If you have a dodgy alternator, generator, or starter motor, you are going to need specialist help, and that’s exactly what Auto Electrical Spares (AES) provides.
For more than 20 years AES has been breathing life back into alternators and starter motors. Ray Chilcott says that the company started out as an exchange business, rebuilding duds as new and putting them back in stock, but most of its business is now supplying new stock. But the team still has the skills to refurbish and rebuild any oddball items that classic car owners might come up with, as long as the armature is OK, says Ray.
Generators provide DC current and usually only at 6V, which made them about up to the task of powering lights and wipers but nothing more. If you actually wanted to see in the dark, or fit an electrical fan, conversion to an alternator is a must.
Breathing new life into failed old or rare alternators and starter motors is still a core business for AES, and it prides itself on a fast turnaround, as trade customers won’t want to take a vehicle off a hoist while they wait. “‘I need it now’ is the catch-cry of our customer base,” says Ray.
AES can also custom-make replacements, but replacement with a more modern unit is more common. “If you have an old Lucas starter, we can supply a high-torque unit that works way better. It will be half the weight, half the size, and with twice the power,” he says.
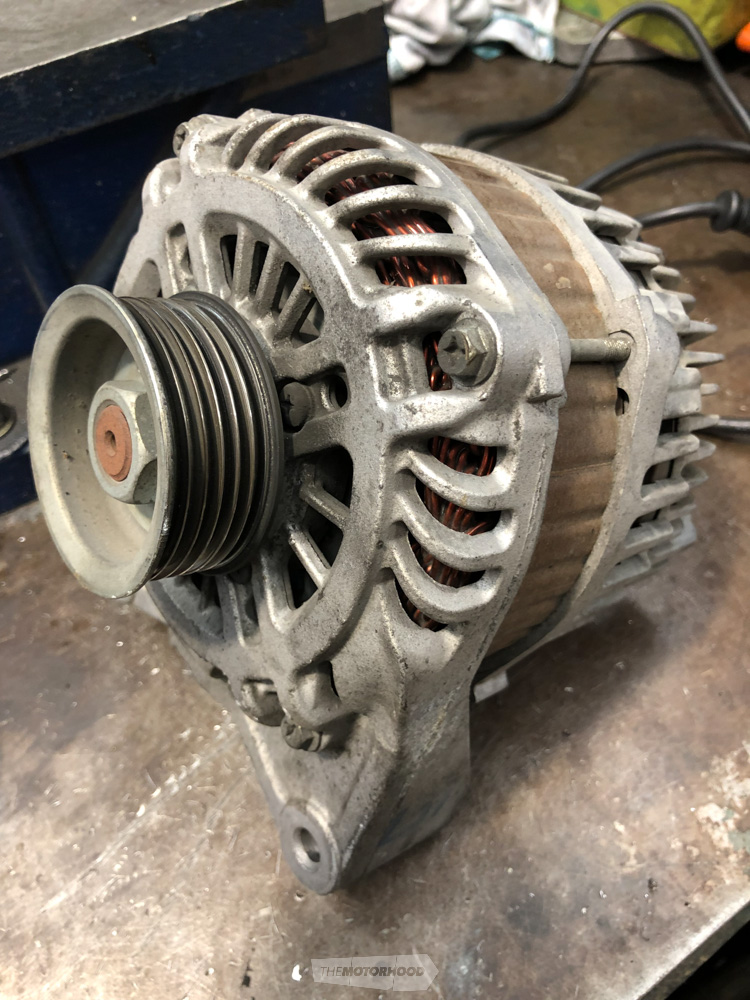
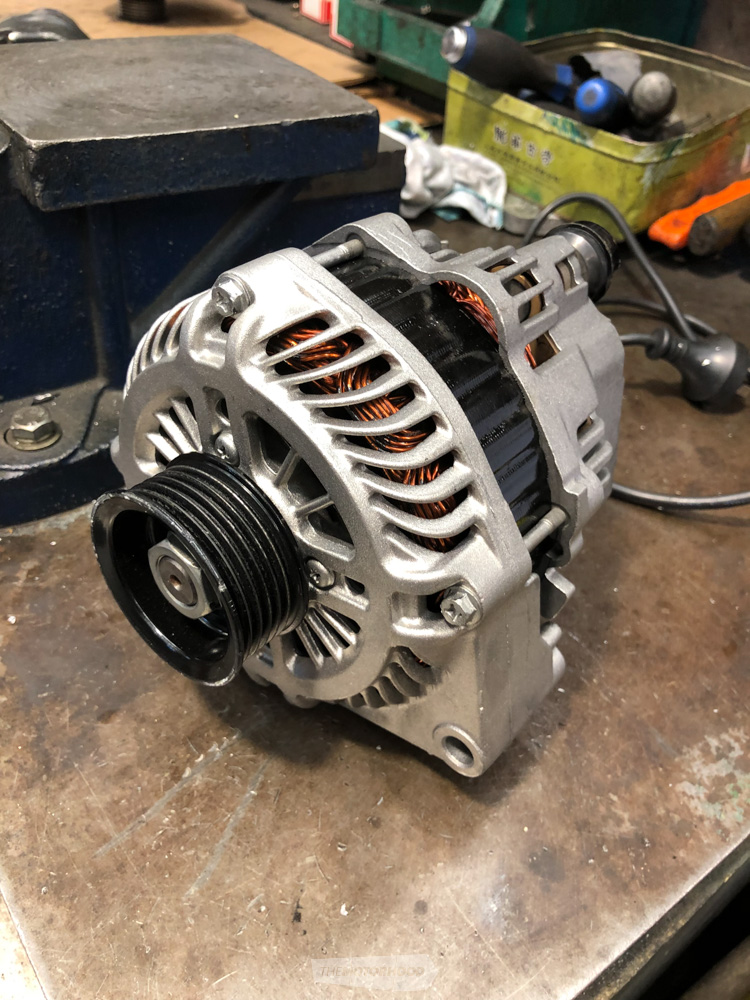
A before and after of an alternator restoration
Six- or 12V
This is also a good time to consider switching from a 6V system to a 12V system. Although 12V is an expensive upgrade, it is more reliable and provides better visibility. However, if your car is not a daily runner and you want to keep your 6V system, then spend a weekend lightly cleaning all the corrosion from light-bulb contacts, fuse-box contacts, each fuse, and any other contact that has a bit of wire attached to it. After a few hours and gentle rubbing with some light sandpaper, a wire brush, or steel wool, you will be amazed at how bright your headlights and tail-lights have become.
Some people will want to keep their 6V system to keep the car original, but, if they have a failed generator with an armature in poor condition, the options are limited, says Ray, as no more of them are being made. “We can rewind rotors, stators, and armatures, but it’s an expensive business,” says Ray. They do a brisk business in converting old tractors to Lucas-type ACRs, the lowest level alternators, the ‘R’ standing for ‘regulator’. Generators use external regulators, which will be bypassed in the new set-up.
Electrical switches can often be refurbished
The good news about older cars is that switches can often be taken apart, cleaned up, and refurbished. As mentioned earlier, the plastic may have hardened and some care will be necessary. Don’t be nervous about taking it apart; even if the casing is broken, it may be able to be refabricated.
Recently, to get a WOF, I needed to get hold of a replacement Rover SD1 auto-selector switch. Unusually, the only solution seemed to be to build one from scratch with a multitude of microswitches, or swap out the entire GM180 gearbox for the more common BorgWarner unit with a working selector switch. As a last resort, I took it round to an old-school auto electrician. The switch snapped as he pulled it apart, but he had the right glue to put it back together. The worn copper pins popped out and he cut short bits of copper rod to use for new contacts. He reassembled it and it works perfectly. Total cost was $15, a box of chocolates, and the joy of possibly being on my Christmas card list for the rest of his life.
What can’t be refurbished may be able to be 3D printed. Although this is a relatively new technology and the types of plastics are limited, you may strike it lucky. We are now in an age in which almost anything can be reproduced.
There is a huge debate on which type of joint is better: soldered or crimped. However, a properly crimped electrical joint will outlast the wire, as solder joints crack over time
To solder or crimp
There is a huge debate on which type of joint is better: soldered or crimped. However, a properly crimped electrical joint will outlast the wire, as solder joints crack over time. For evidence of this, we have only to look to the aeronautical industry, which generally has higher standards than the automotive industry. There are only a handful of soldered wires on the modern jet; the rest are crimped.
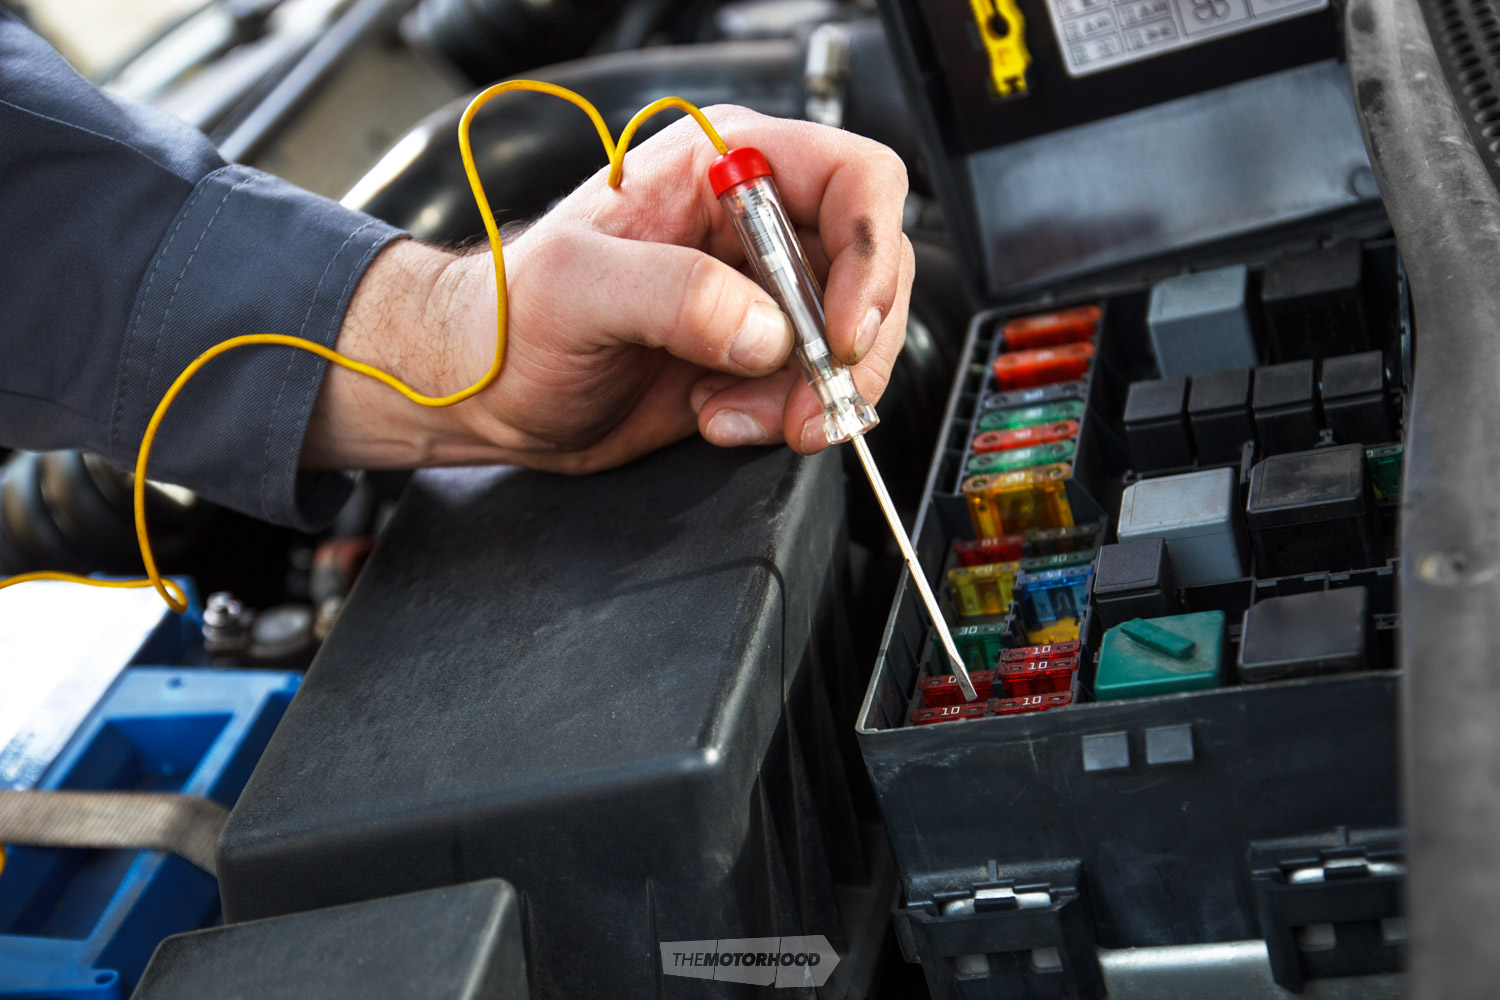
Testing circuits
Finally, I recommend that you invest in a cheap multimeter. Simple faults can be found very quickly. An even more useful device is a 12V screwdriver wire-tester, which can be used for checking most of the simple wiring faults found on a classic car. If the light in the screwdriver glows, then the circuit is OK.
THANKS TO OUR EXPERTS
Thanks to our experts for their assistance in creating this technical feature: P&B Group’s Paul Muldoon, ph. 07 847 5241; Otorohanga Auto Electricks’ John Ryan, ph. 07 873 7373; and AES’s Ray Chilcott, ph. 0800 478 278.