data-animation-override>
“You know how important an engine’s radiator is, but do you know how they’re made? We go behind the scenes at New Zealand’s biggest radiator-manufacturing plan”

Chances are that, at some point in your life, you will have encountered a vehicle overheating. How often you come across such a problem is another issue altogether. If you’re the type to just buy a car and drive it, all is probably well; if you own an older classic, its cooling system may not have been developed with modern traffic issues in mind; and if you prefer to pull your motors out and hot them up — no pun intended — then you’ve probably dealt with about as many cooling problems as engines.
The problems arise because internal combustion generates heat, and engines built for performance will, by default, generate more heat. The heat is a by-product of the combustion events that keep the motor running and the friction between moving parts that results when a typical automotive engine is operating — often at many thousands of revolutions per minute.
To dissipate the heat generated, most engines are water cooled. The casting process for engine blocks, heads, and intake manifolds will almost always incorporate water channels to allow coolant to circulate through the areas most exposed to extreme temperatures, to dissipate any heat that is generated. The coolant mixture is commonly an ethylene glycol–based solution that expands as it heats up, increasing pressure, which, in turn, lifts its boiling point to beyond that of plain water. Even so, the coolant itself still needs to be cooled continually in order to dissipate heat properly.
This is where the radiator is comes in. The water pump pushes coolant through the water channels, and the heated mixture eventually circulates through the radiator, which is positioned for maximum exposure to ‘cold’ air. The flow of cold air through the radiator reduces the temperature of the coolant by dissipating the heat to the atmosphere, and the coolant is then recirculated through the system to absorb more heat.
While the entire cooling system represents the effectiveness of a fundamentally basic concept, there is quite an art to how the radiator core — where the magic happens — actually works and is assembled. We were lucky enough to visit Auckland-based Adrad National Radiators to observe first-hand how it all happens, and here’s what we found out.
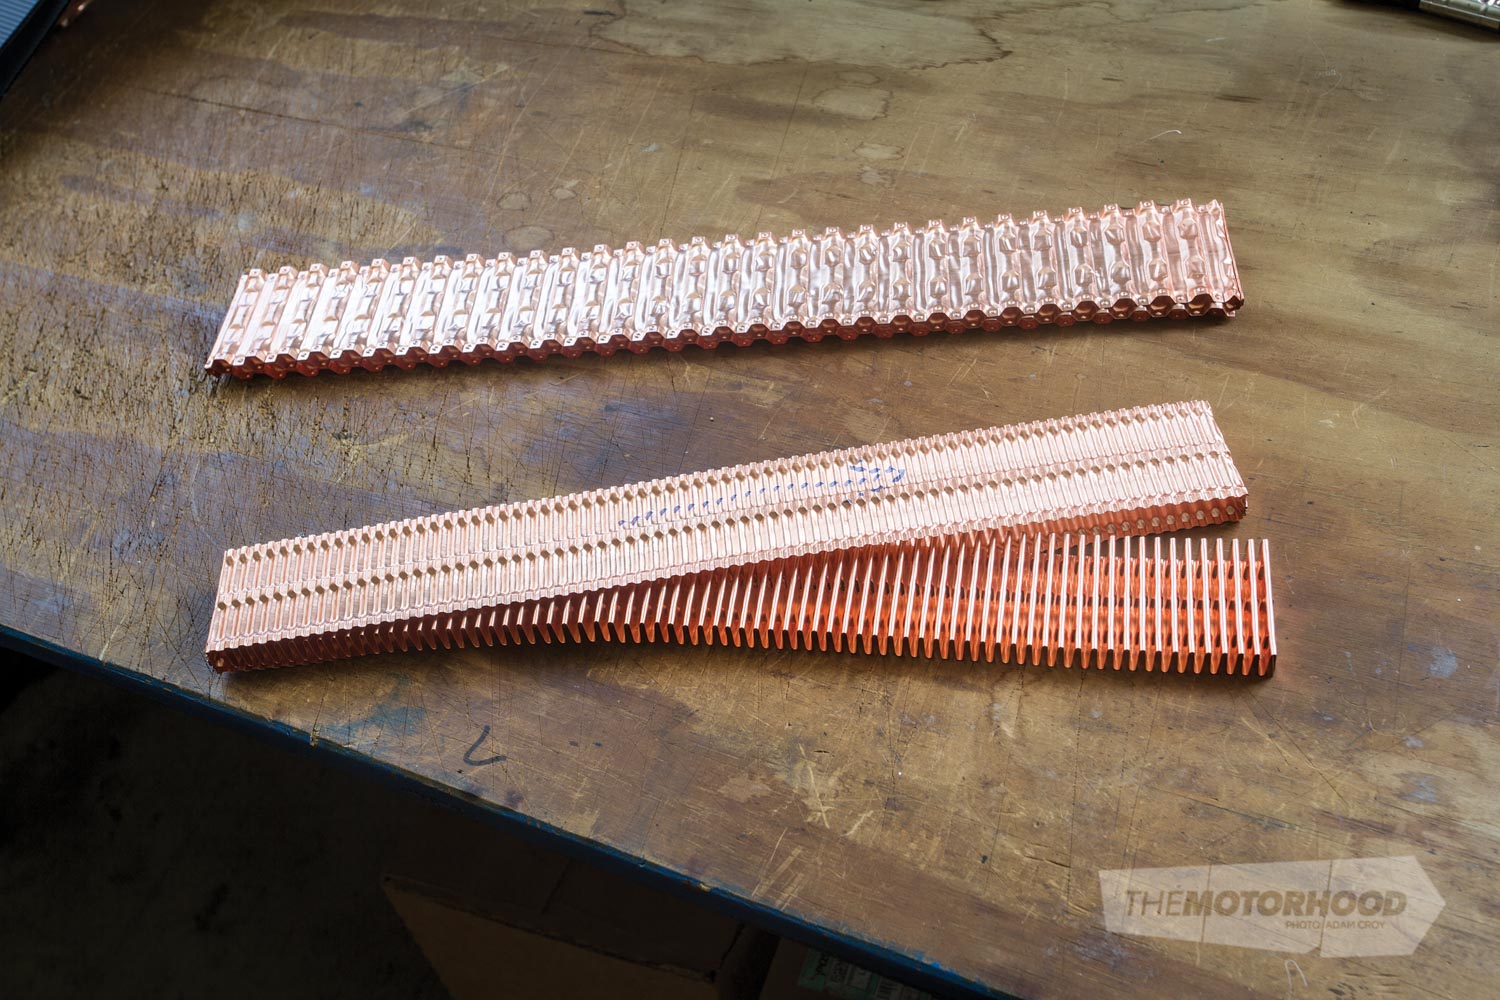
The general automotive radiator ‘CT’ core contains a large number of finned, narrow coolant channels, giving a high surface-area-to-volume ratio. The resulting convection effect allows rapid heat dissipation. However, there is a process involved in turning a stack of raw materials into a radiator core, and, looking at the materials involved — rolls of copper, lengths of brass tubing coated in solder, and brass sheets — it can be tricky to see how it all goes together.
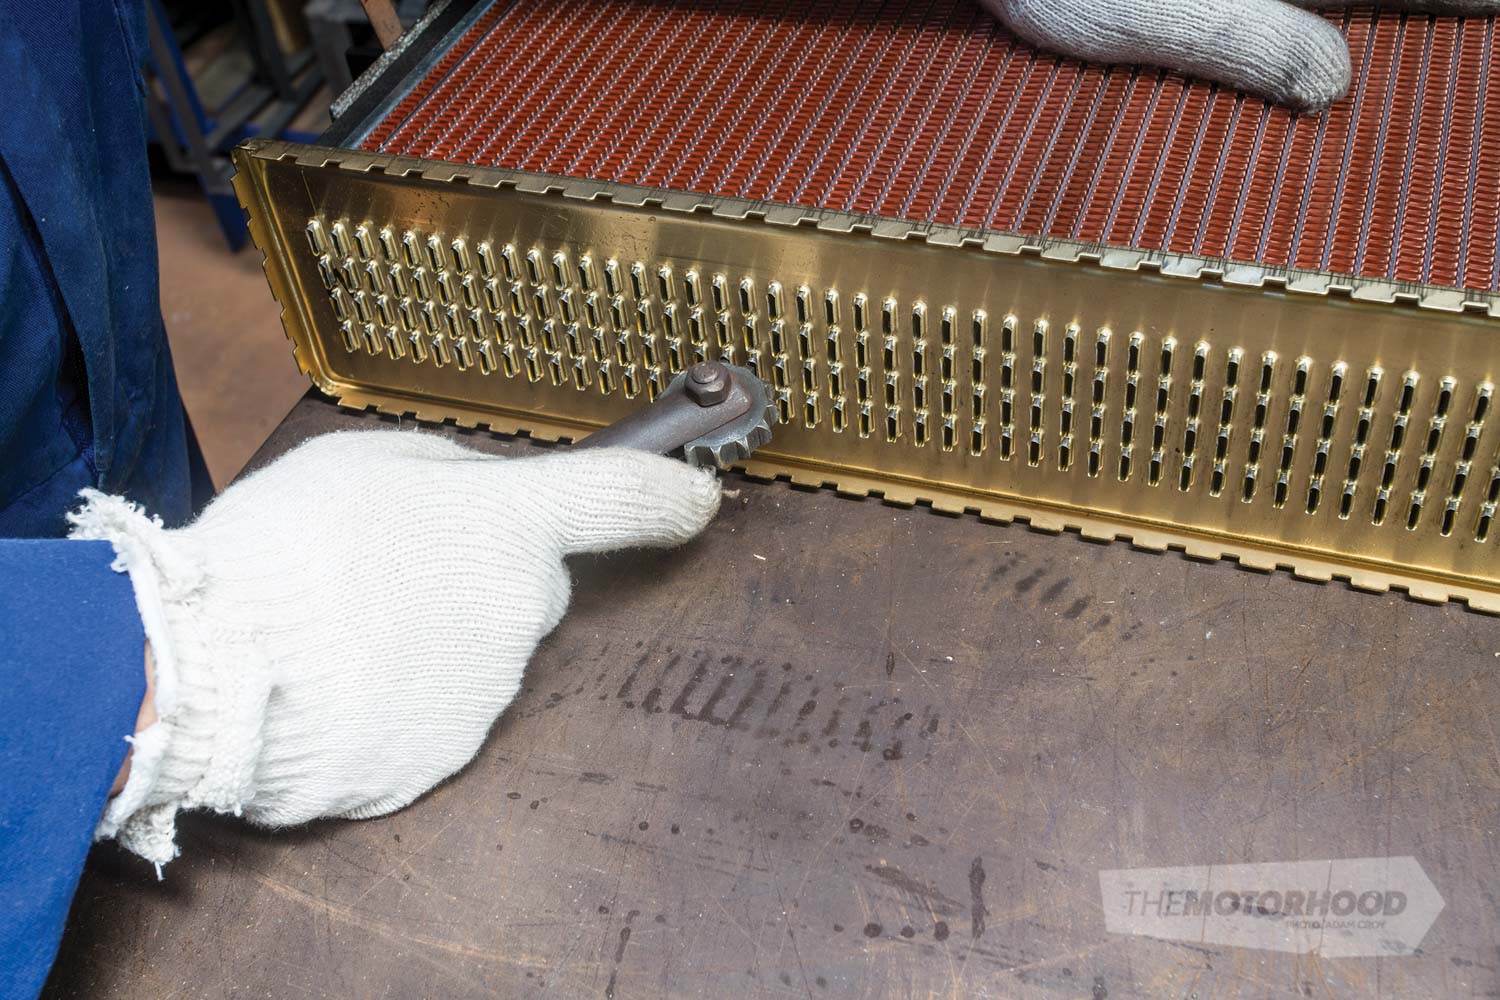
Header plates
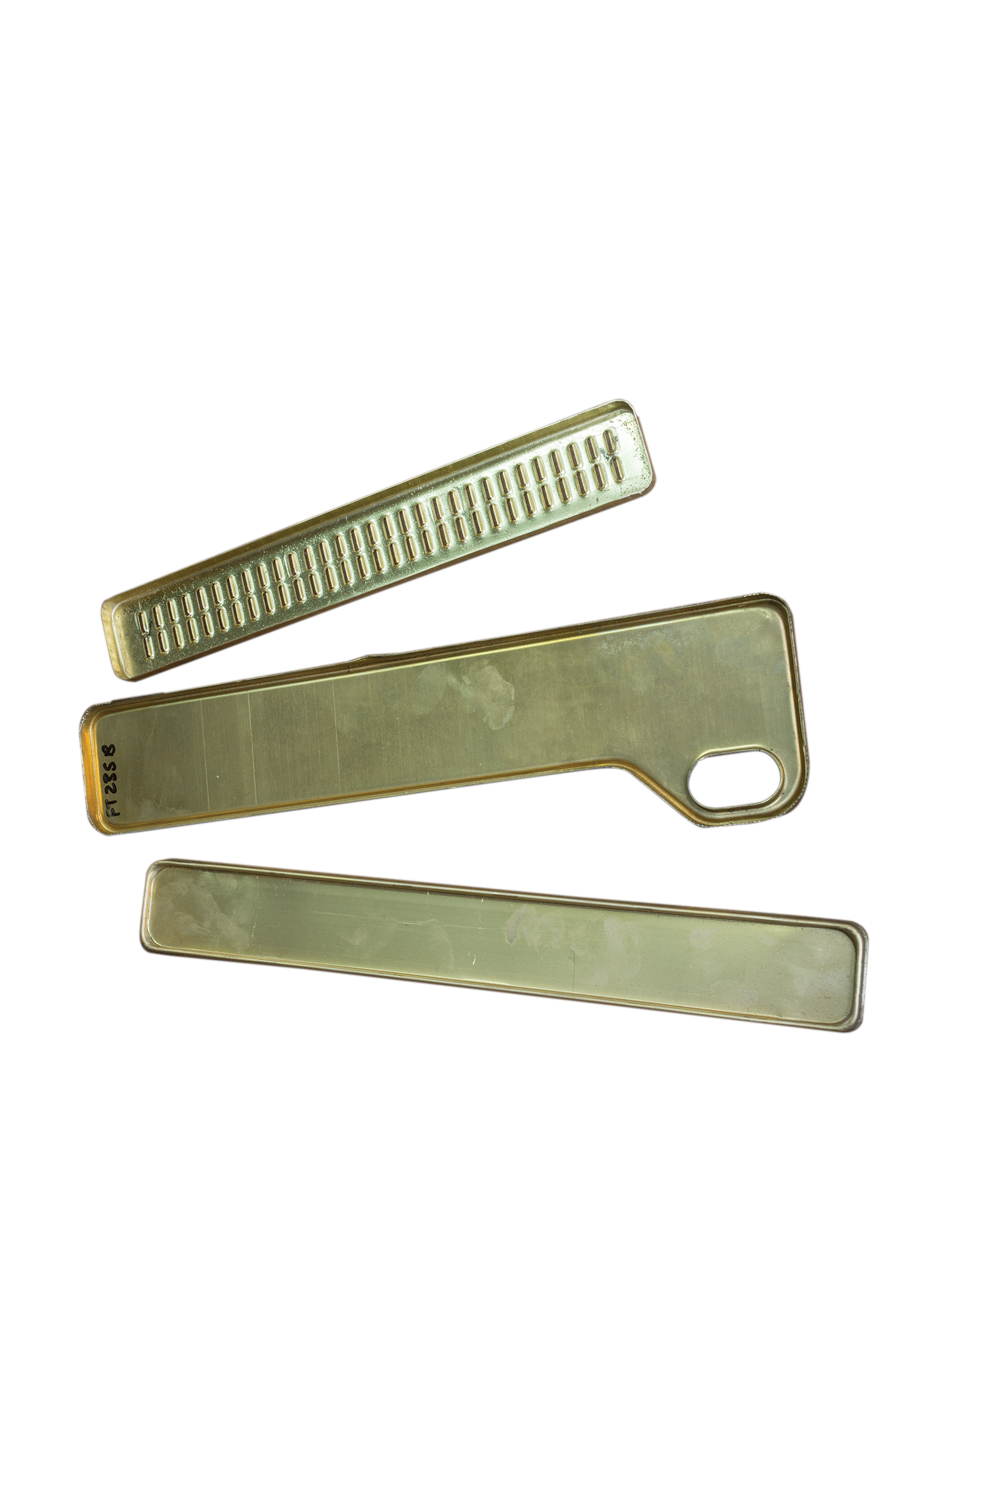

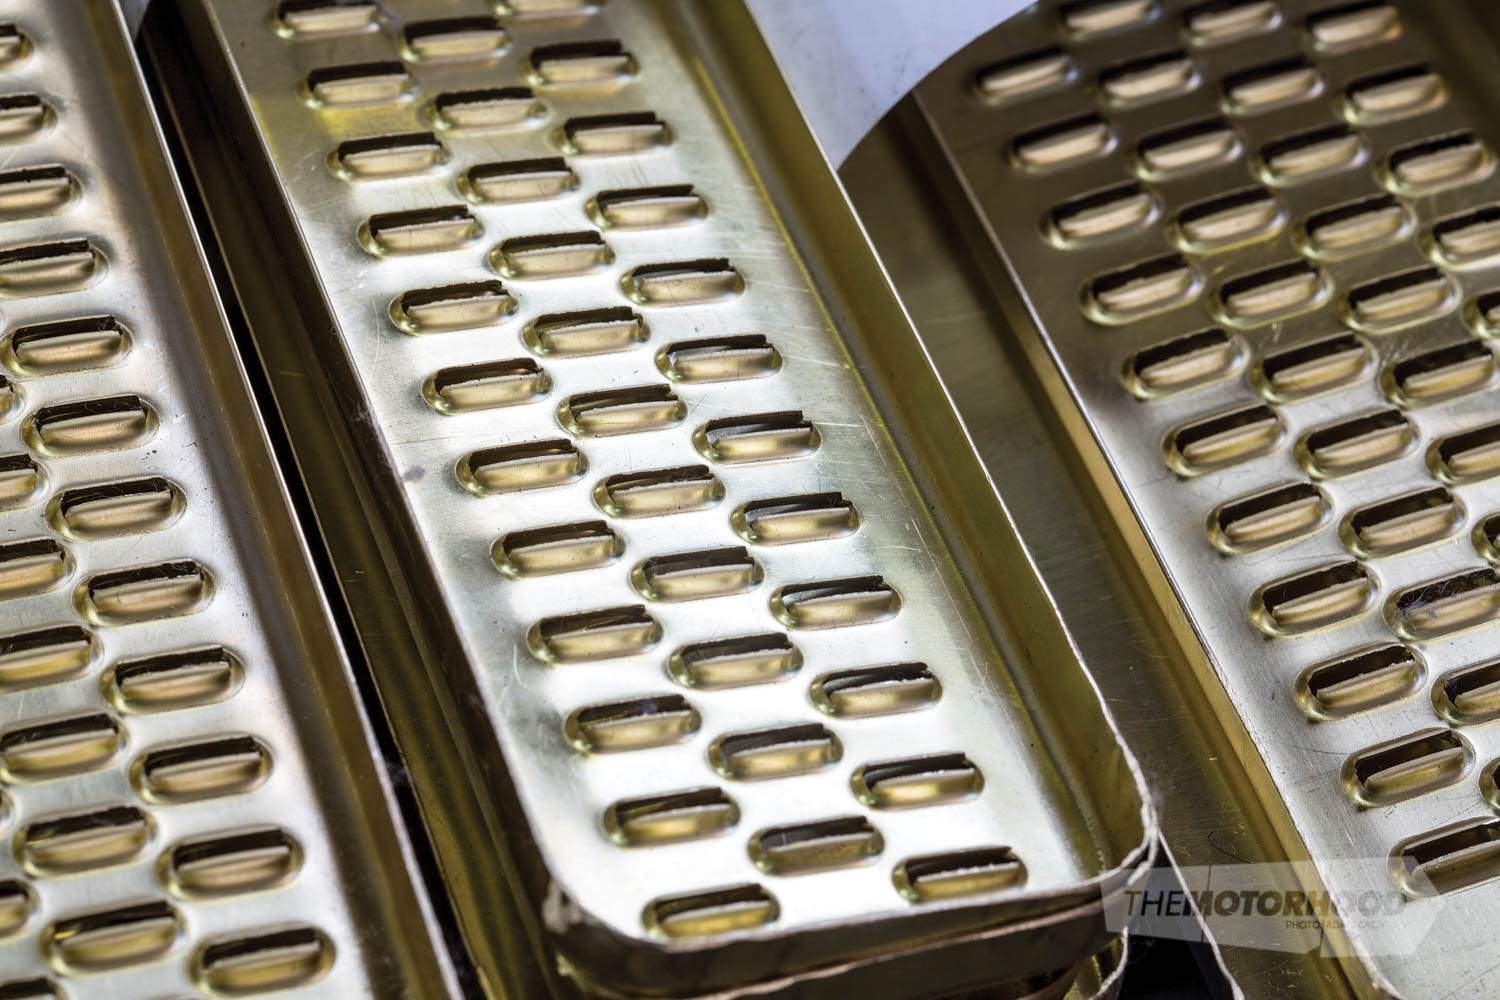
The header plates are an interesting place to start, since they are unlikely to resemble anything that comes to mind when you think of a radiator; however, as the conduit between the header tanks and the actual core of the radiator, they are a very important component.
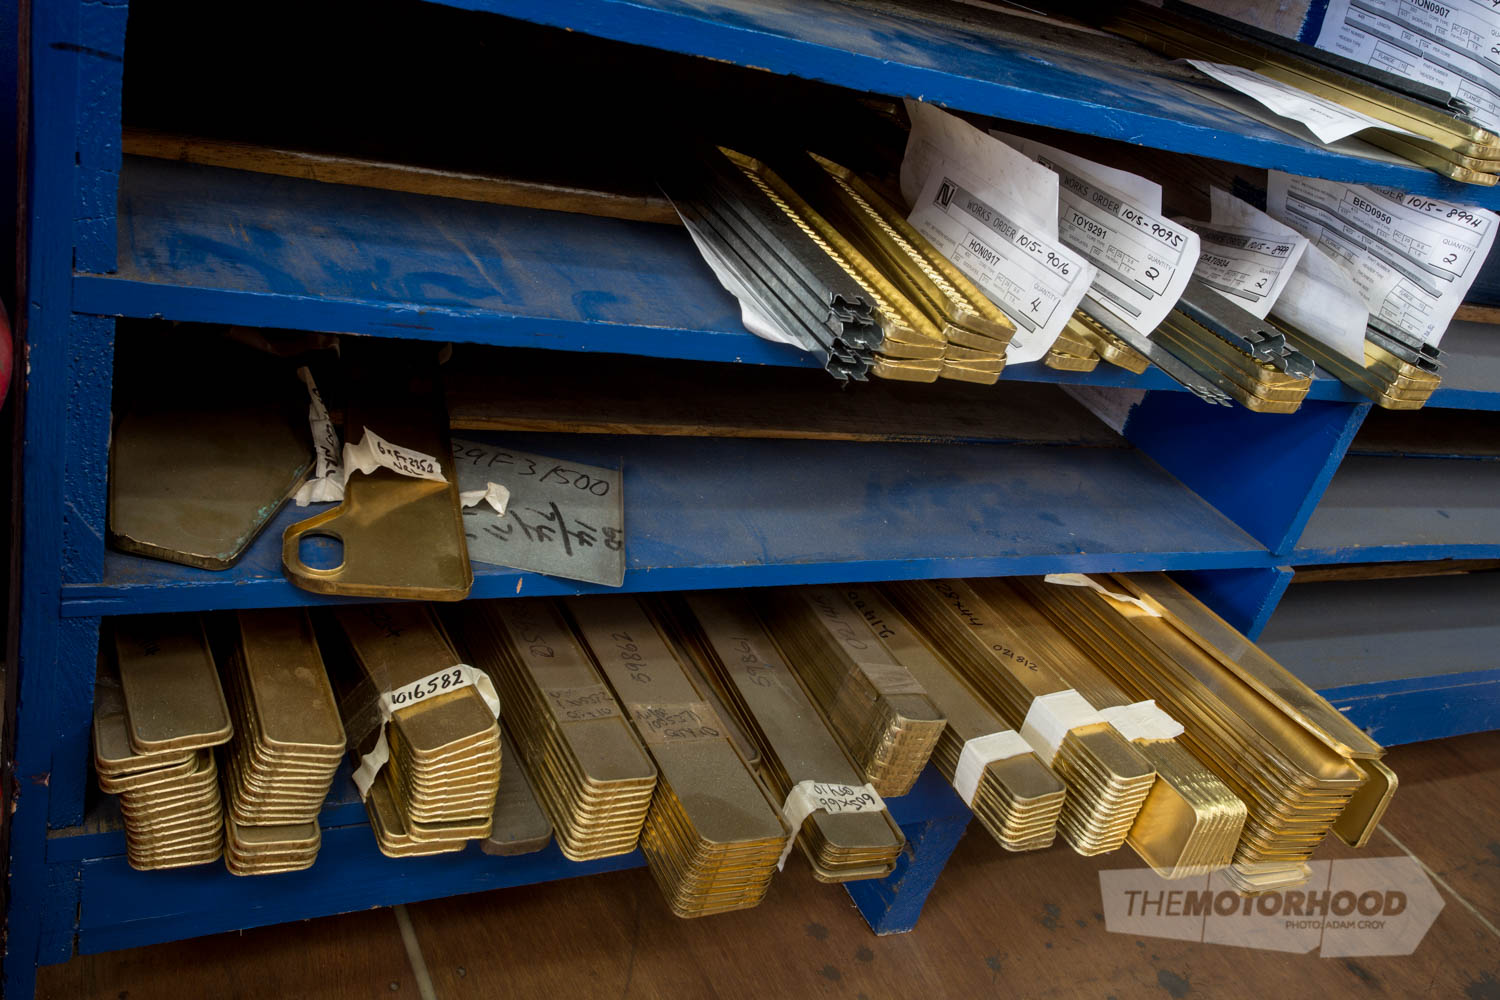
The header plates begin life as sheets of brass, which are cut to the right size according to the radiator’s specifications. A job sheet will specify the number of rows required, as well as the radius of the corners.
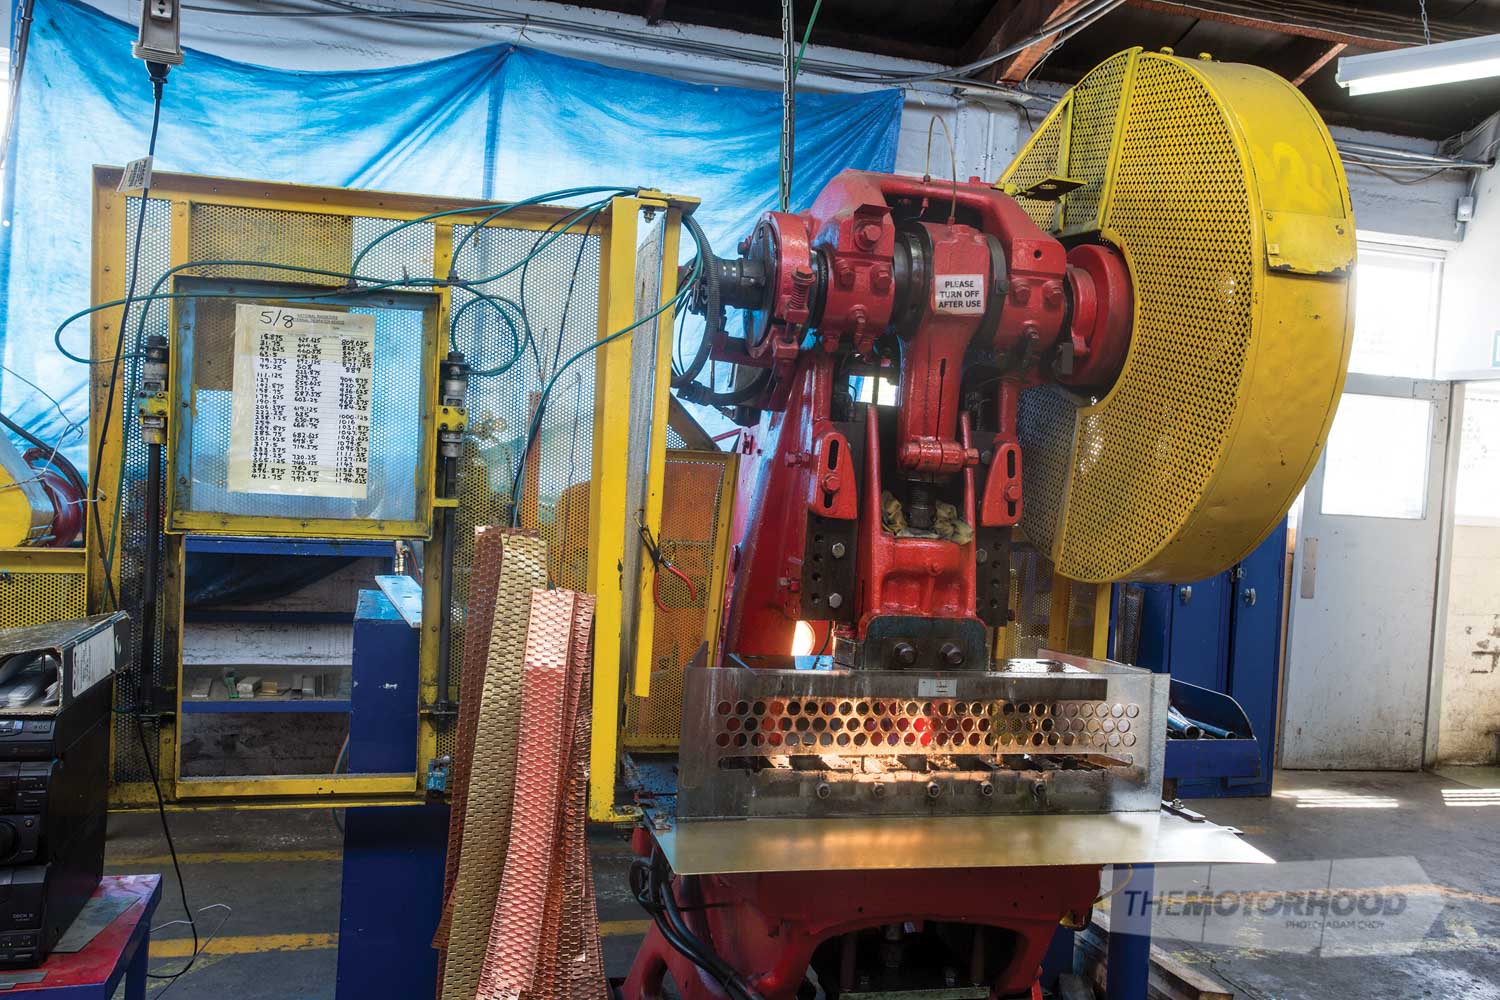
The brass sheets, having been cut to the correct dimensions, are pressed for what are known as ‘piercings’ — holes through which the coolant will flow. The die used in the press is chosen to suit the radiator-core requirements. From here, the brass sheet, with fresh piercings, is brought to have its corners cut to the appropriate radius.
The header plate is then brought to the radius-forming press, where it will meet with one of a number of different radius dies, depending on the corner radius required. The process essentially gives the header plate a folded edge, along both the flat edges and the corner radii.
The completed header plate is ready to be attached to the rest of the core, the assembly of which is covered next. These can be made with different mountings, including bolt-on, weld-on, or with castellated edges that lock into place in plastic header tanks, sealed by a rubber O-ring. Adrad carries a range of header tanks for a variety of applications, from plastic header tanks for daily-drivers through to bolt-on brass tanks for a Kenworth truck.
The Core

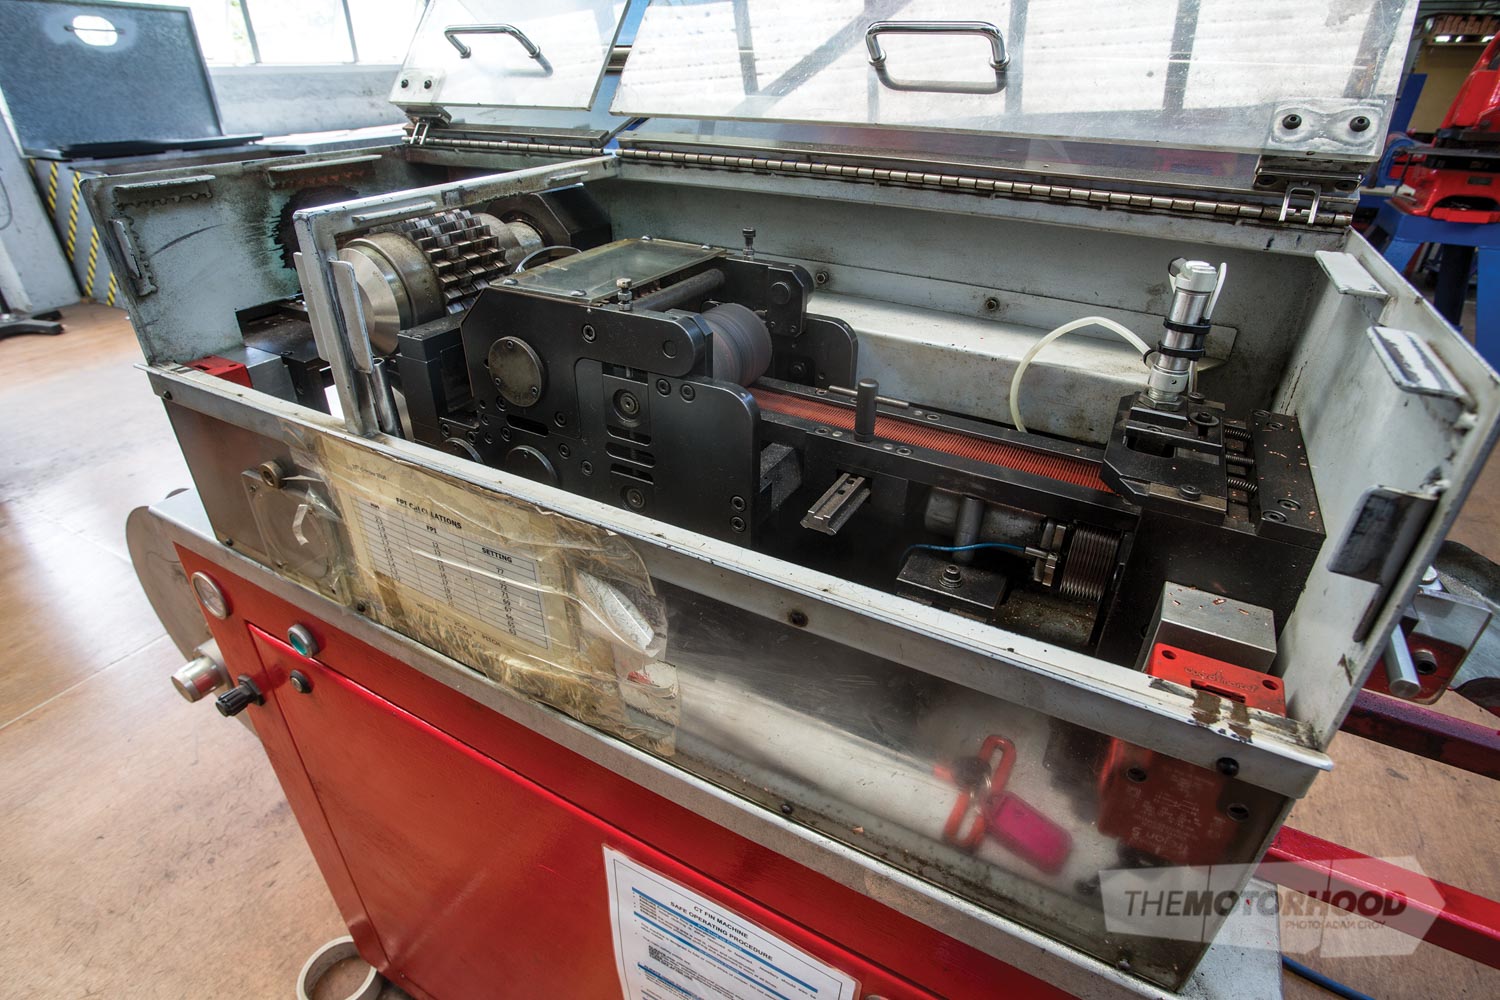

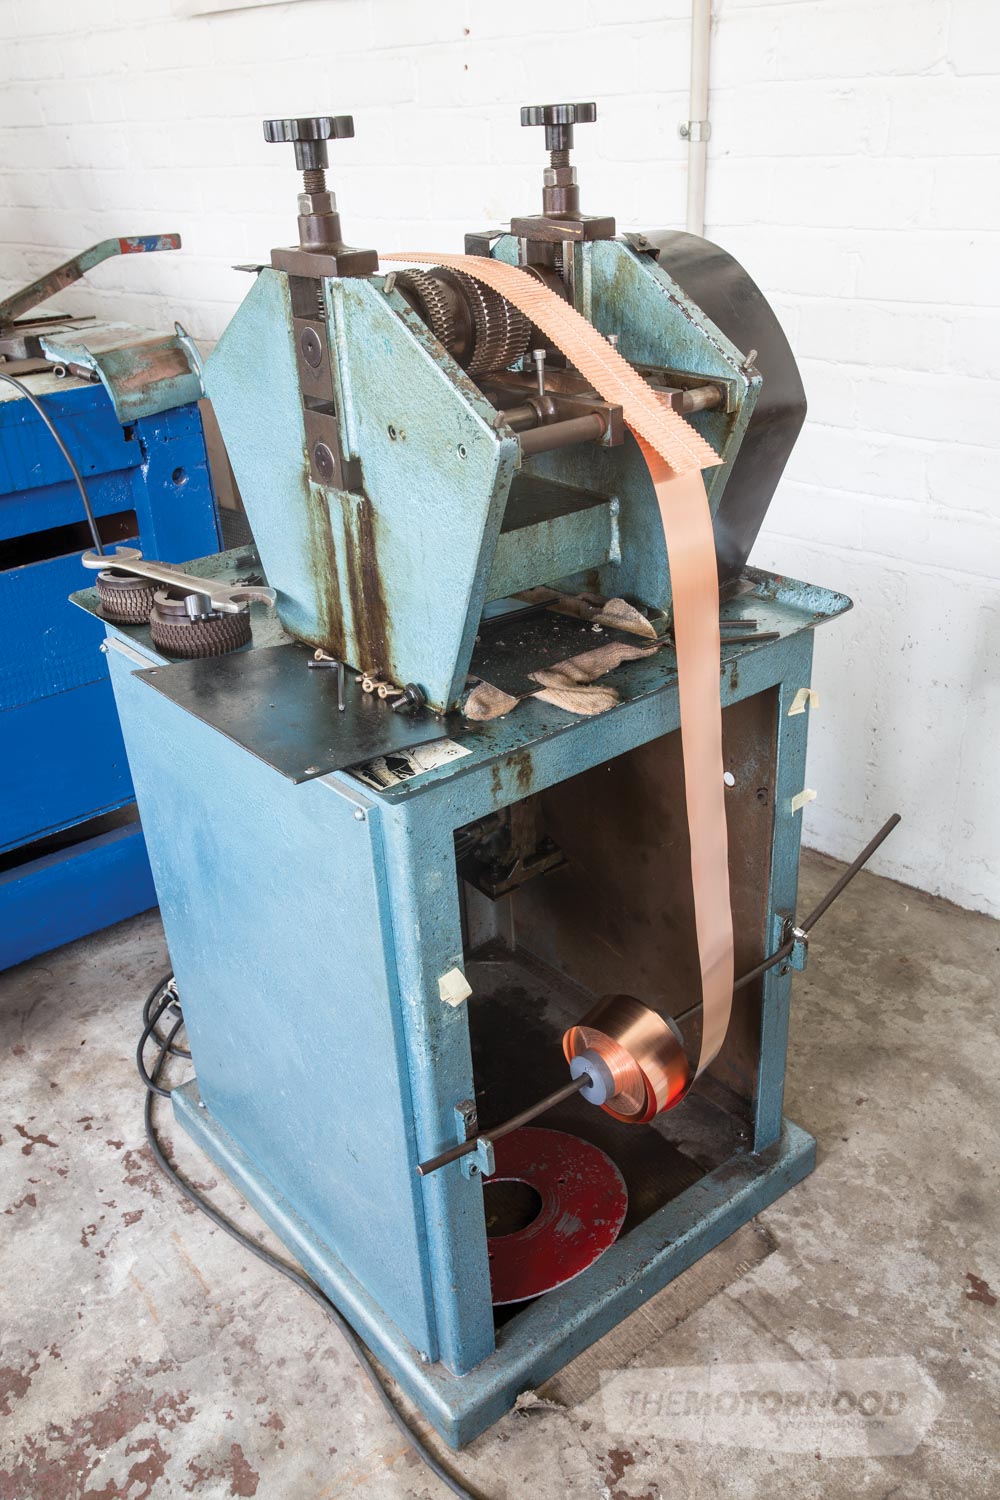
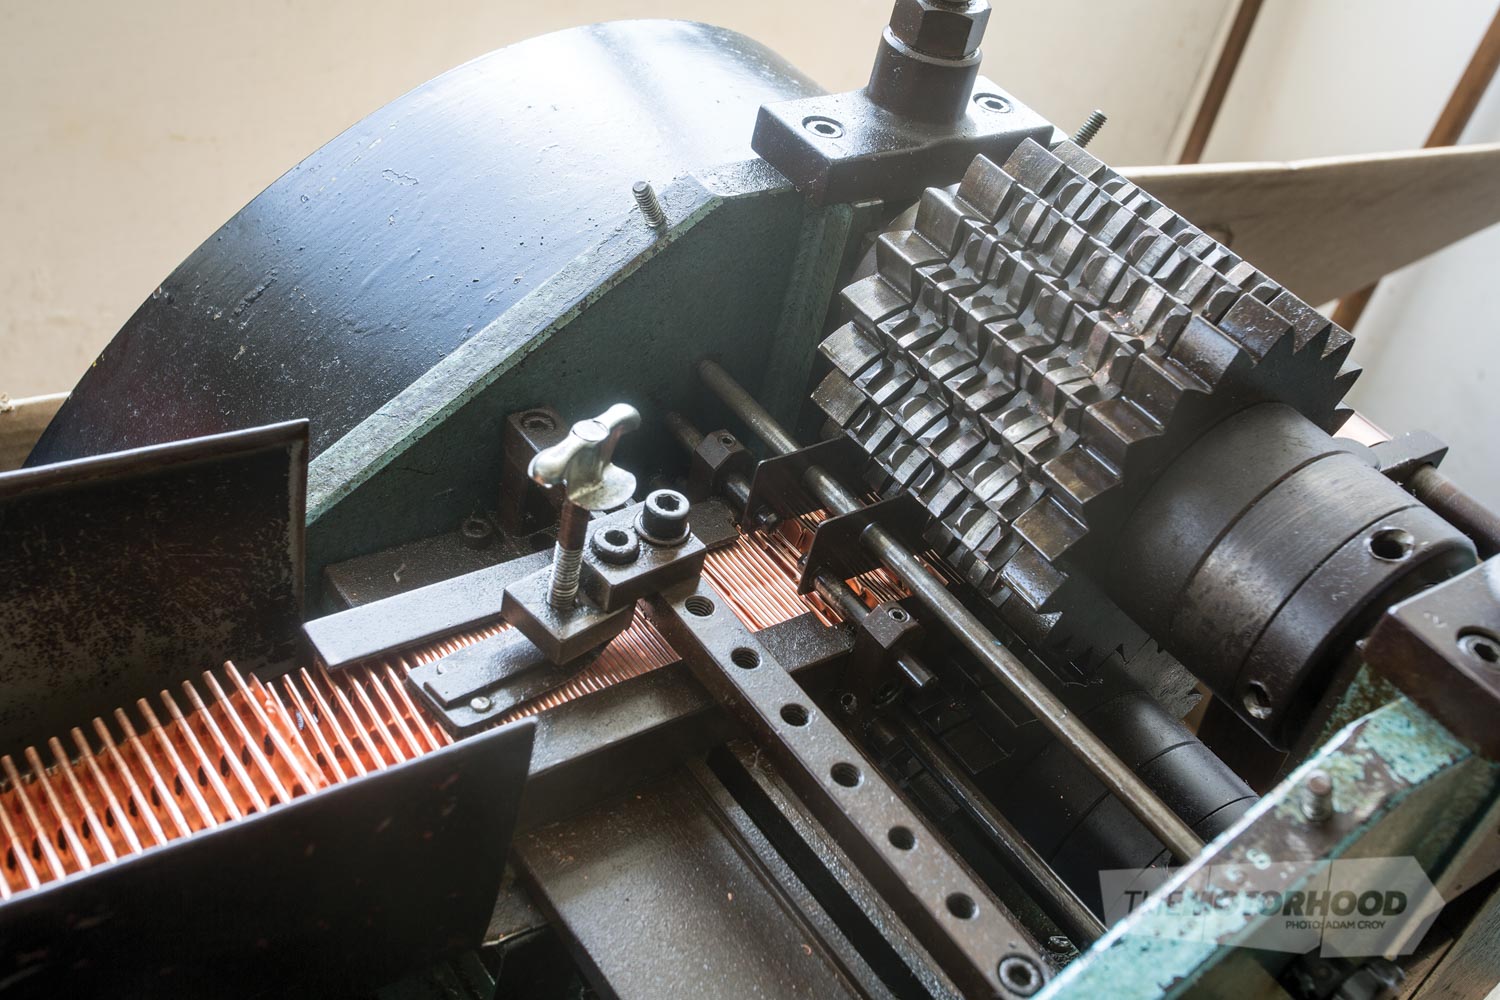
The first step in producing the actual core of the radiator involves the ‘CT fin machine’, which is fed a large spool of copper that will eventually form the fins. The machine stamps the copper to achieve the accordion-like zig-zag shape, and punches louvres in it if required, before compressing the length to an appropriate fins-per-centimetre measurement. All of this is preprogrammed into the machine according to the radiator being assembled, with each aspect of the procedure important in its own way.
The number of fins per centimetre is calculated based on the broader picture of the radiator’s application. If it is to be a narrow-core radiator, the convection effect could be enhanced with a narrower pitch, whereas a thicker core would function better with a more open pitch — “Having too tight of a fins-per-inch on a thick-core radiator would be like hitting a brick wall — not good for air flow,” explained Tara Maylin, Adrad’s New Zealand manager. Louvred fins are superb for most road-going vehicles, with enhanced cooling capabilities, but would not be used in certain applications. “On a hay-baler or machinery working in lime works, for example, it’s likely that louvres will not be stamped, and will have a more open pitch, due to the likelihood of seeds or foreign matter being lodged between the fins,” Tara said. Such radiators also use a tubular-style core, rather than the CT cores shown here, and the design will make it easier to waterblast or manually clean the radiator core without damaging the fins.
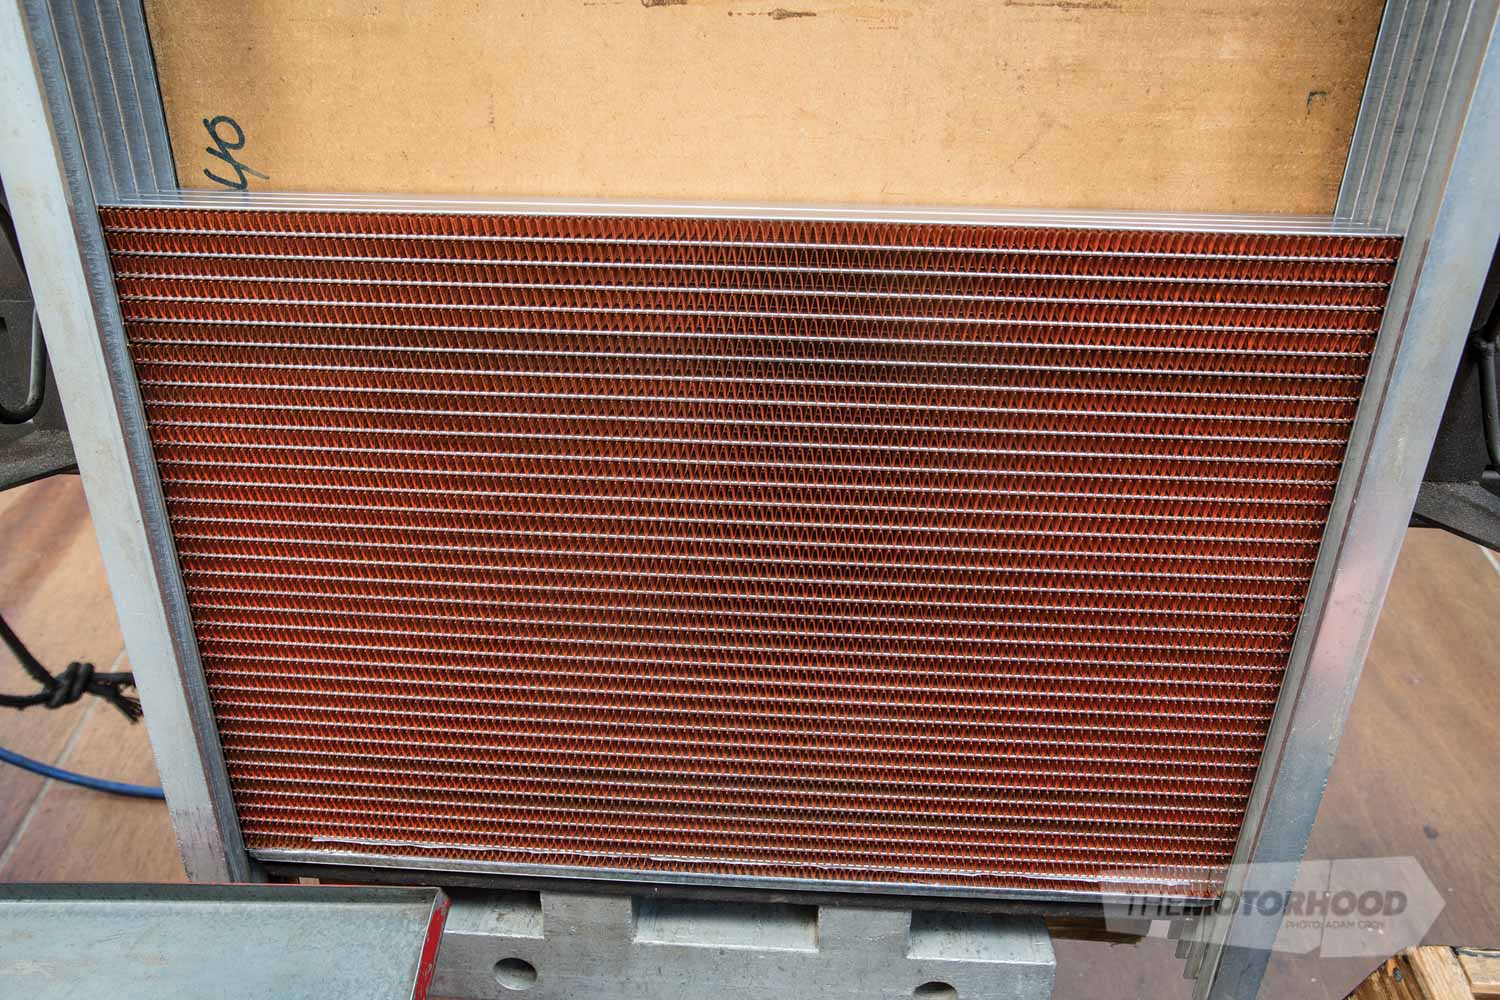
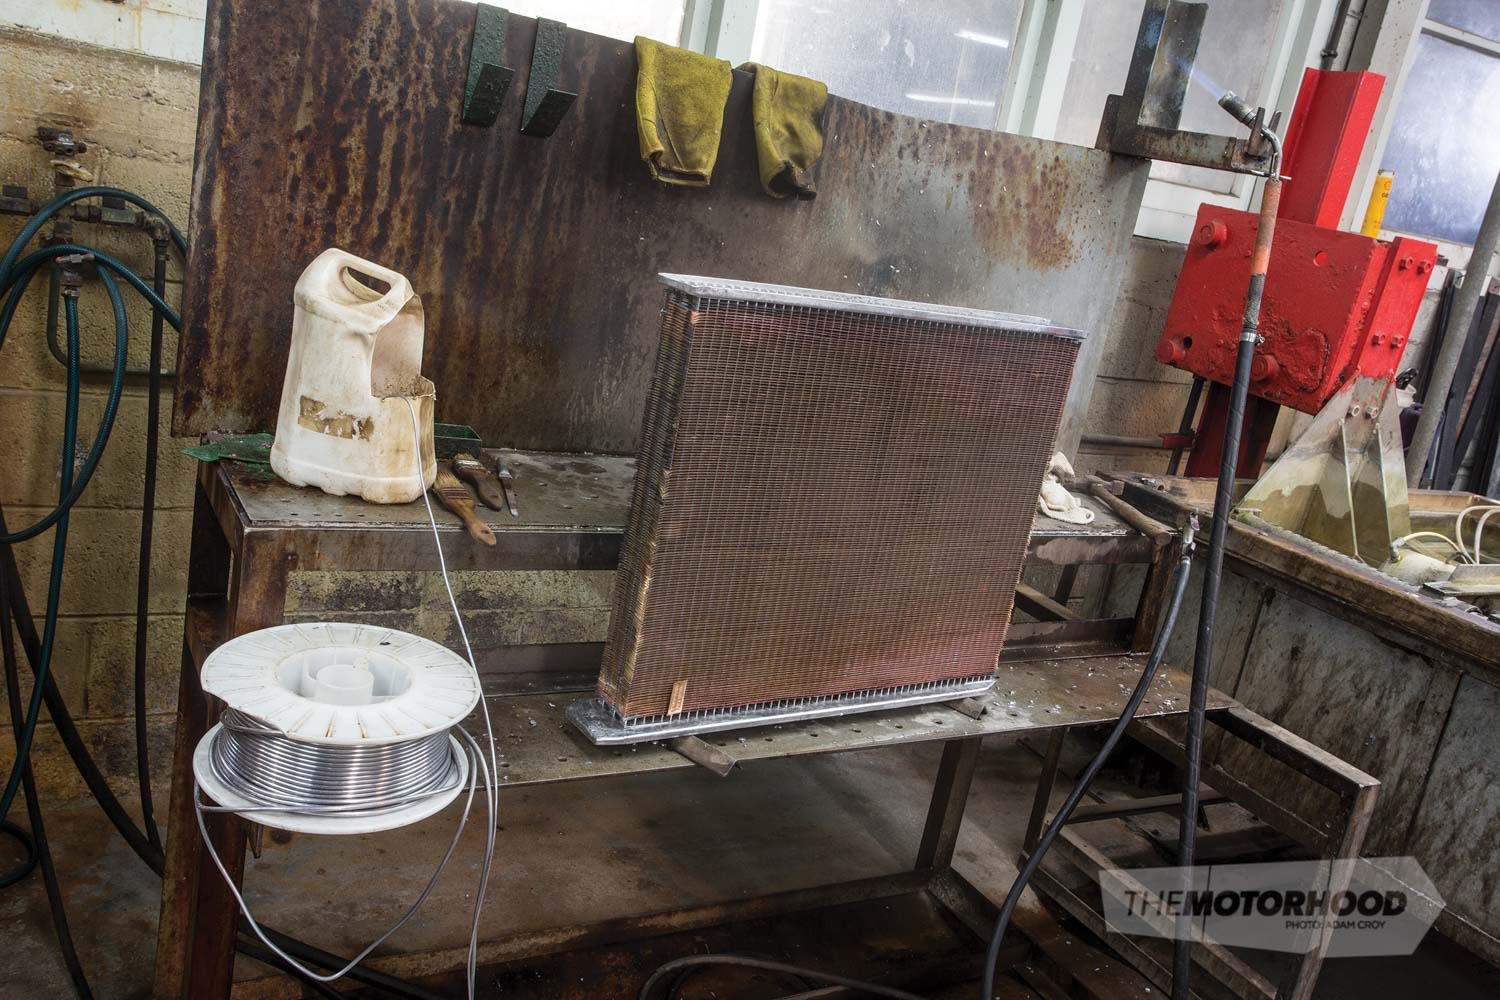
Once the copper fins have been produced, they are arranged into what begins to resemble a radiator core. The tubes through which the coolant is channelled are brass that has been coated with solder — the solder coating will melt and fuse the fins with the tubes when the core is baked in a special oven. At this stage, the core can still be touched up cosmetically if it needs to look perfect, though aesthetic blemishes don’t adversely affect performance. Once the core has been baked, it stays as-is.
The fins and tubes are stacked alternately until the radiator-core specifications are met, with galvanized side plates on the top and bottom edges. A roll of solder is also applied between the galvanized side plates and top and bottom fins, as well as between the next row of fins — this is for adhesion, as stated in Step 2, since the uppermost and lowermost rows are most susceptible to damage from flex or pressure.
At this stage, the rows are stacked loosely, and the core assembly is clamped together from top to bottom to achieve the specified core height. Once the height has been achieved, the core assembly is held in place within a baking frame.
With the radiator core within the baking frame, the header plates can be applied. As described in the previous section, these are manufactured concurrently in a different part of the factory known as the ‘press shop’.
The header plates will eventually be connected to the header tanks — whether by welding, bolting, or locking tabs in plastic-tank applications. With the header plates in place on either side of the core and the ends of the tubes protruding through, the tube ends are flared to increase the water-channel openings for optimized fluid flow.
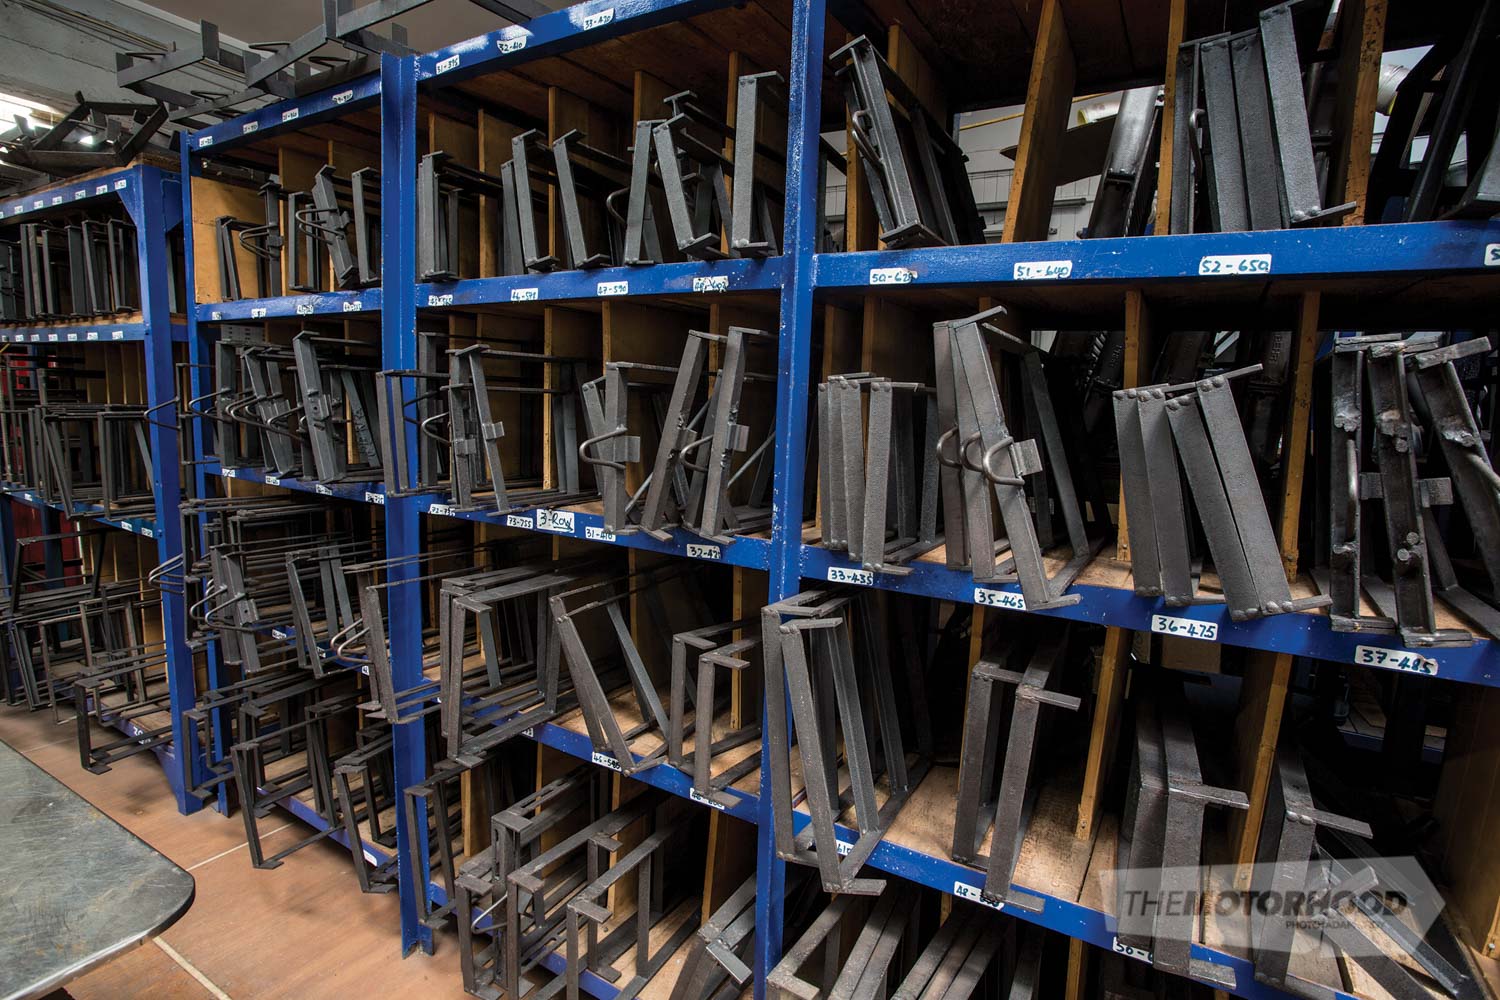
Custom Engineering
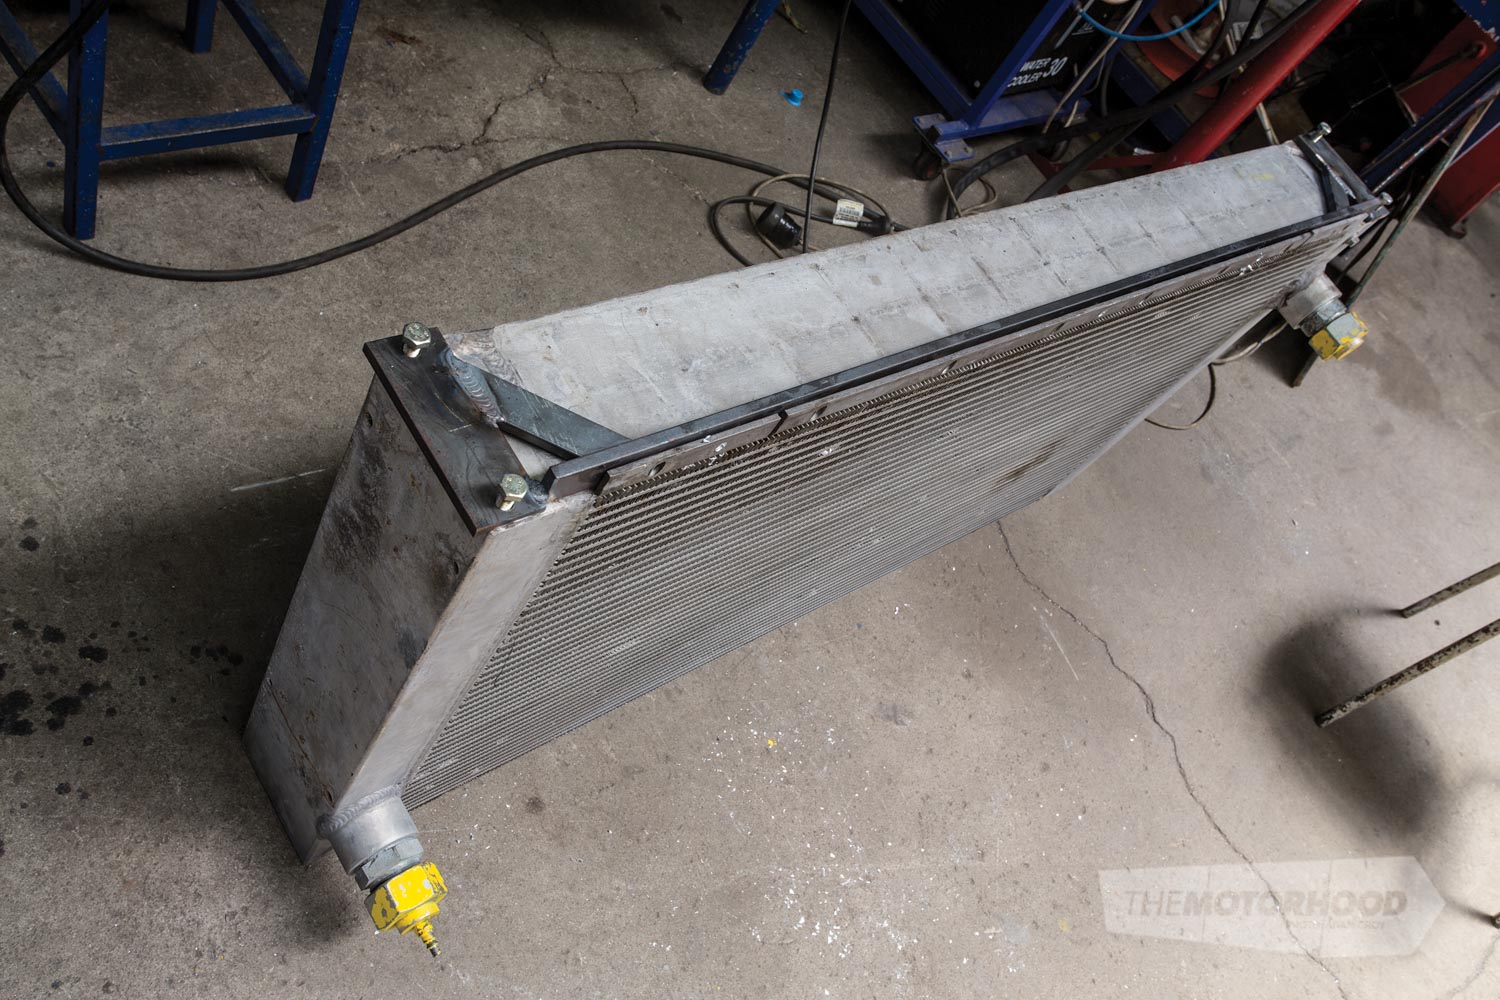
If a complete radiator, not just the core, is required — for example, if an off-the-shelf unit can’t be sourced — that can also be arranged. Usually, the old header tanks will be cut off the old core and re-welded onto the new core, although new header tanks can also be custom fabricated.
“The engineering guys do any job that is ‘too hard’, whether it’s repairs, custom work, or jigs,” Tara said. “They’re not allowed to say no — they just have to figure out a way to do it!”
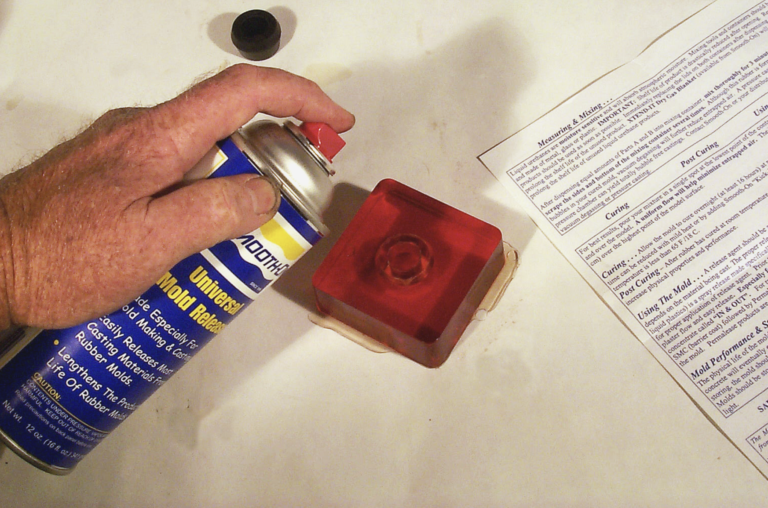
This example is in for a re-core. Since only the core is being replaced, with the existing header tanks being reused, it is having a jig made up before being taken apart. The jig will allow the header tanks and fan-shroud mount to be perfectly lined up with the pre-existing holes once the new core is in — failure to get this right will almost certainly result in a radiator that does not fit.
Finishing

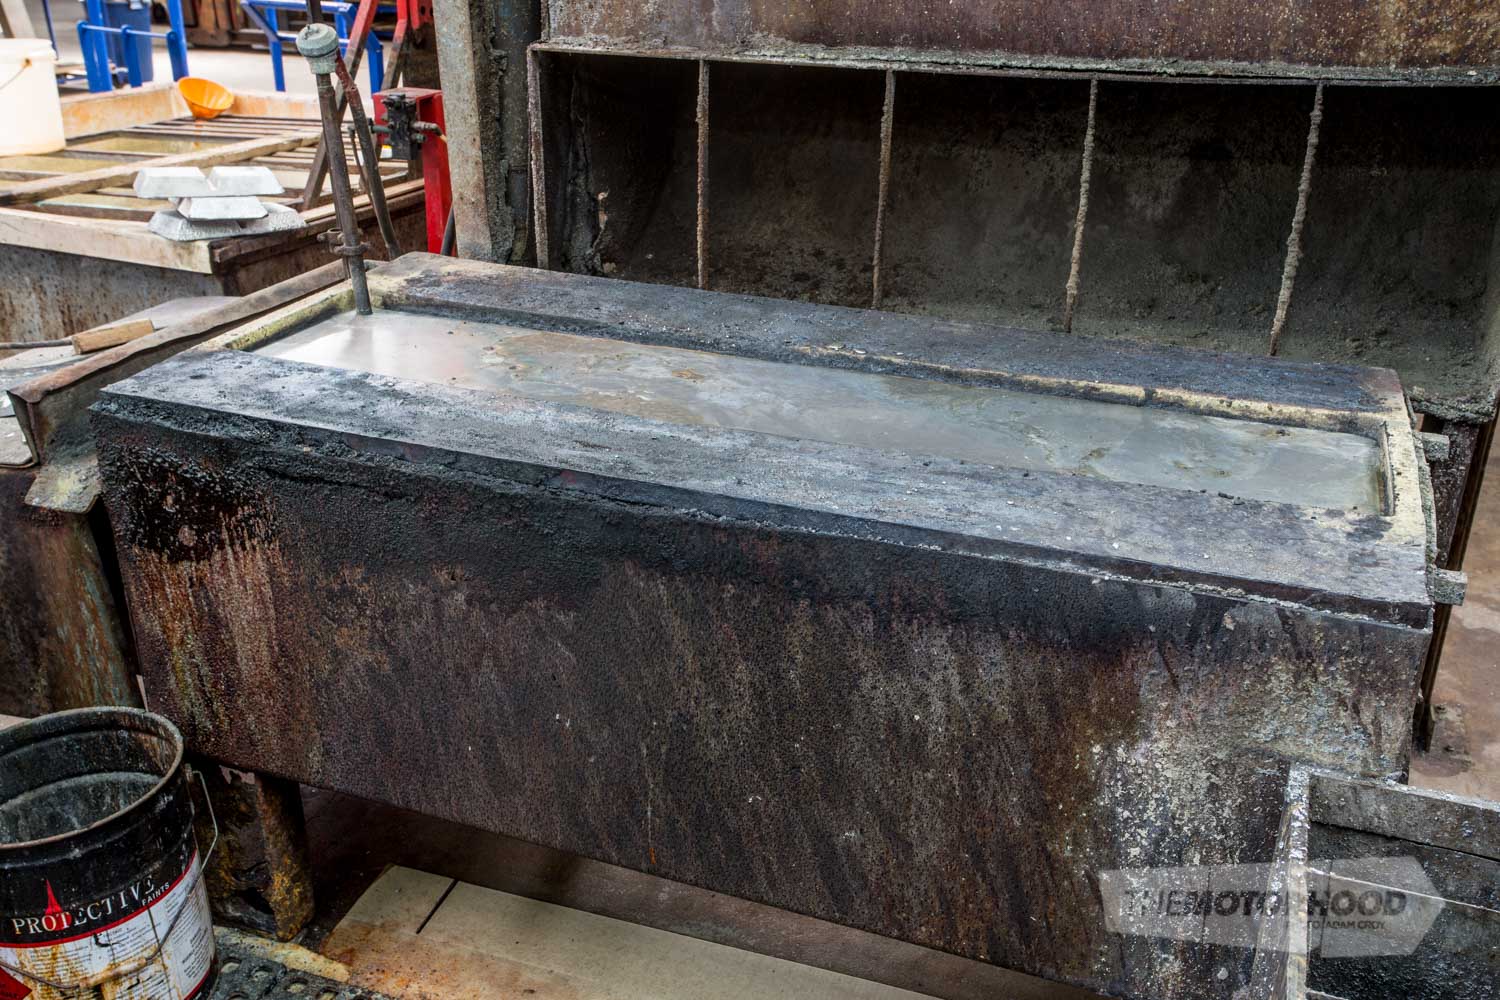
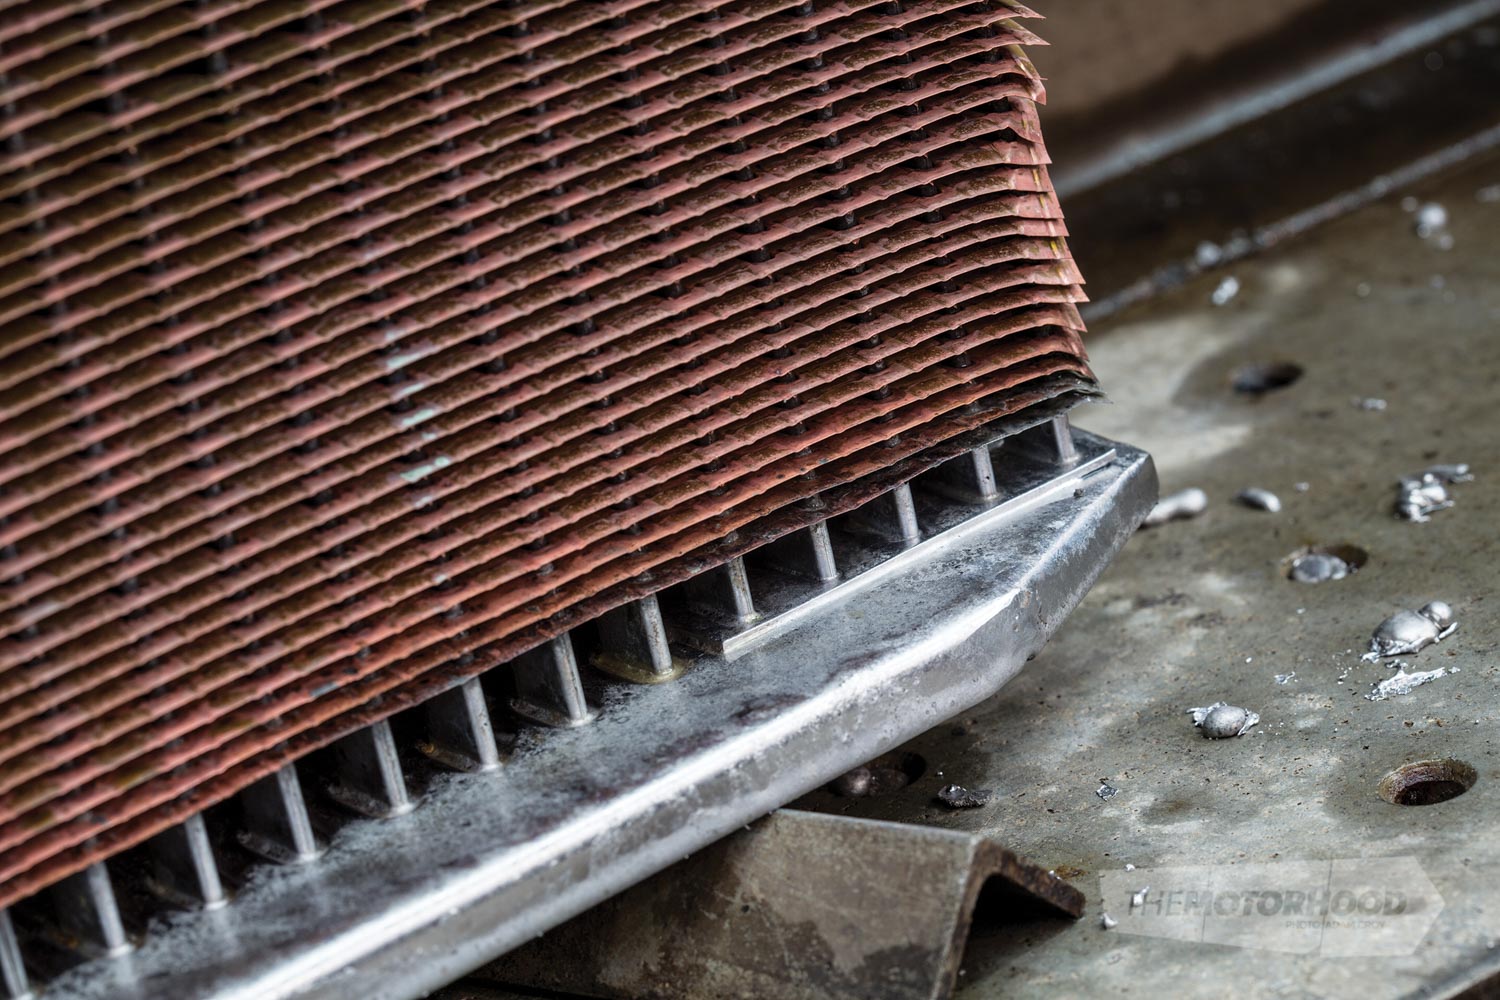
The assembly is now ready to enter the baking oven, where, as noted, the solder that coats the tubes will melt and adhere to the copper fins and to the header plates. This process renders the core a complete assembly that no longer needs to be supported by the baking frame. The core shown directly above has just been baked and is being allowed to cool before it progresses to the next step.
Having cooled, the baked cores are secured in such a way that the header plates are immersed in a tub of molten solder for a few seconds before being blown out with compressed air.
The core assembly is manually inspected and touched up, with any pinholes around the header plate soldered up, as is the reinforcing plate — if applicable — between the side plate and the lowest copper fins.
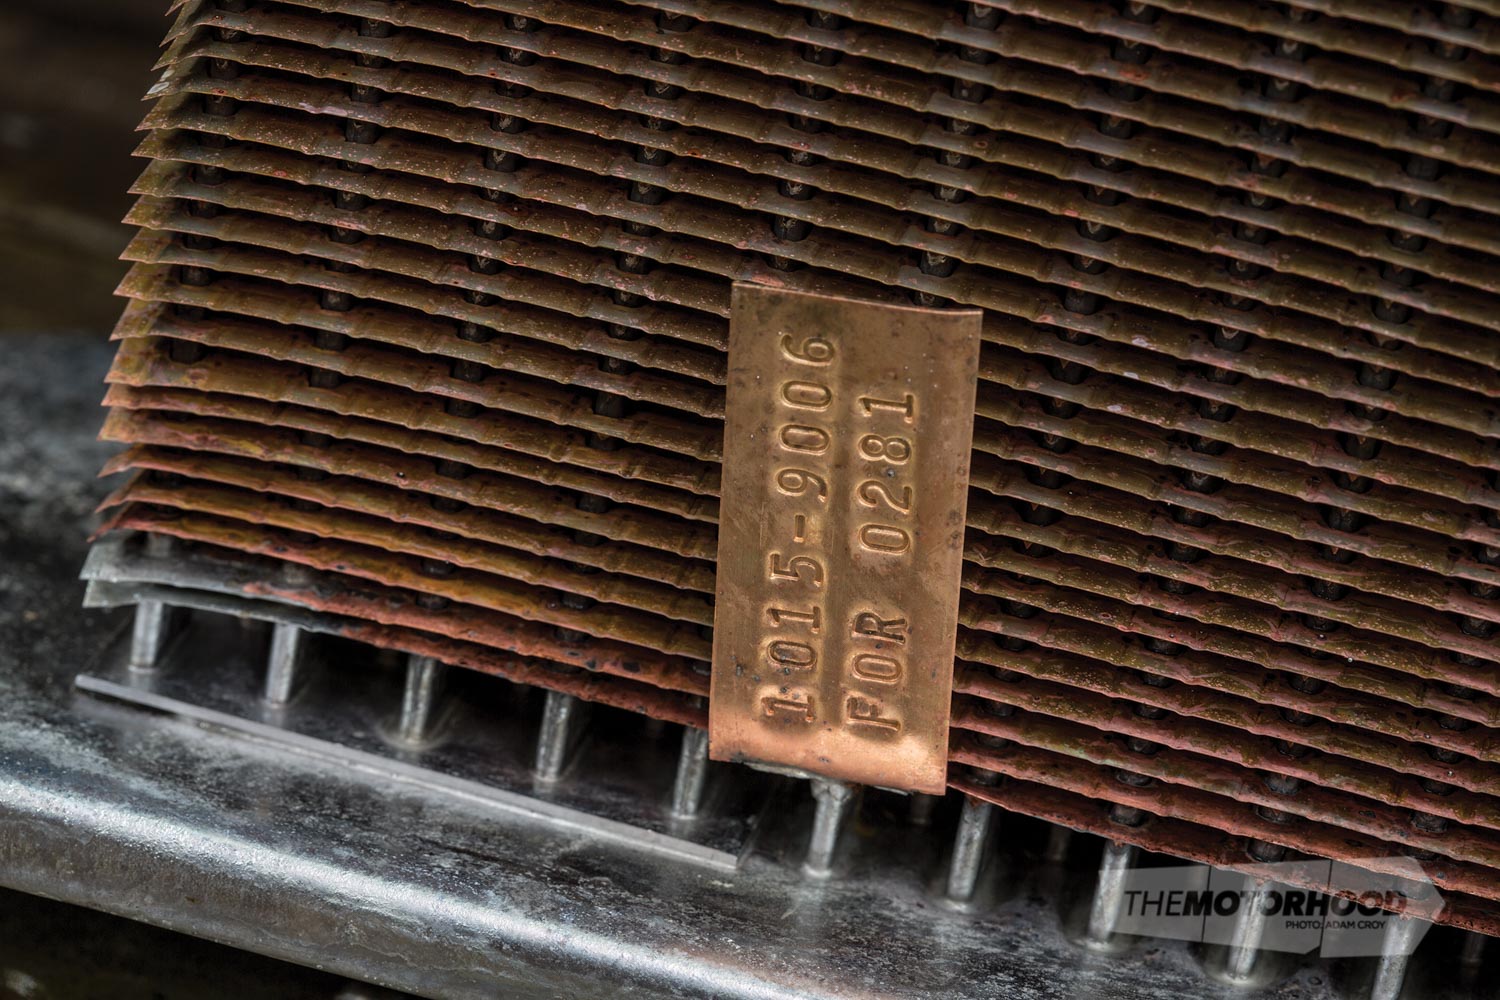
Some radiators require corner reinforcing plates, some require full-length reinforcing plates, others require none at all — if any are required, though, this is when they are soldered on. The example here has reinforcing plates at the corners only.
An ID tag is also attached, stamped with the date of manufacture as well as the job number, for easy future identification of the radiator.
Testing
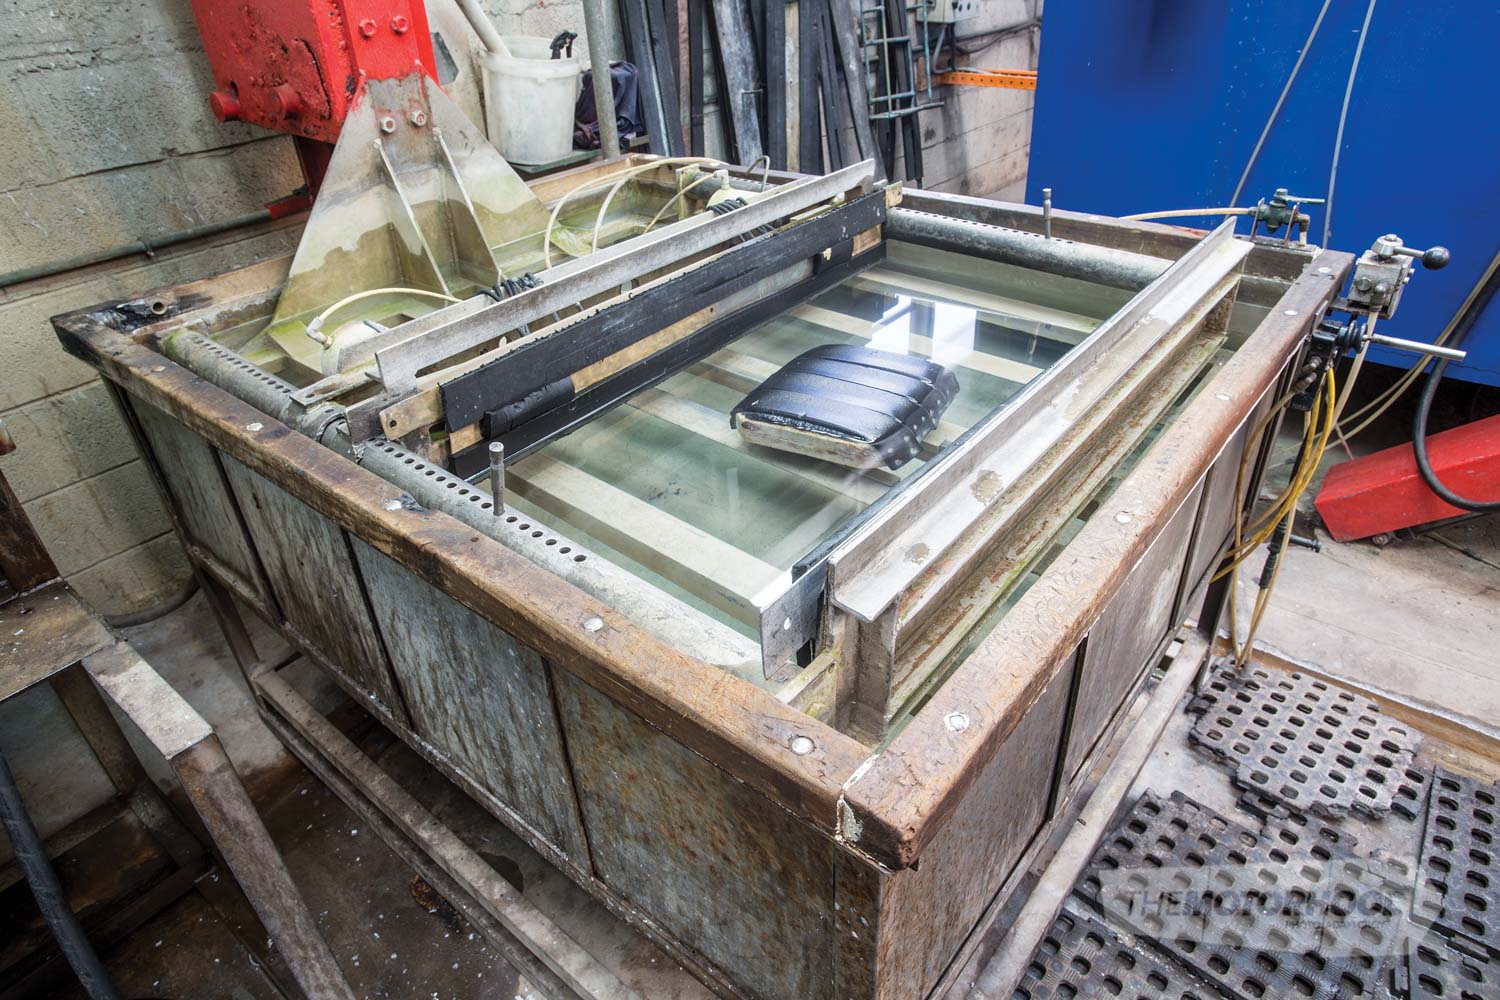
It’s looking like a complete core now, but it’s not quite ready for the shelf yet, as it still needs to be tested. The radiator’s header plates will be closed up and the whole core submerged in water. Any air bubbles will indicate leakage, which must be rectified before the radiator core goes any further.
From here, the radiator is washed out in fresh water, to off clean any flux or chemicals that may remain in or on the core, before entering the drying oven. This is set at a much lower temperature than the baking oven, as the last thing needed is melted solder — it simply allows for the radiator to be properly dried.
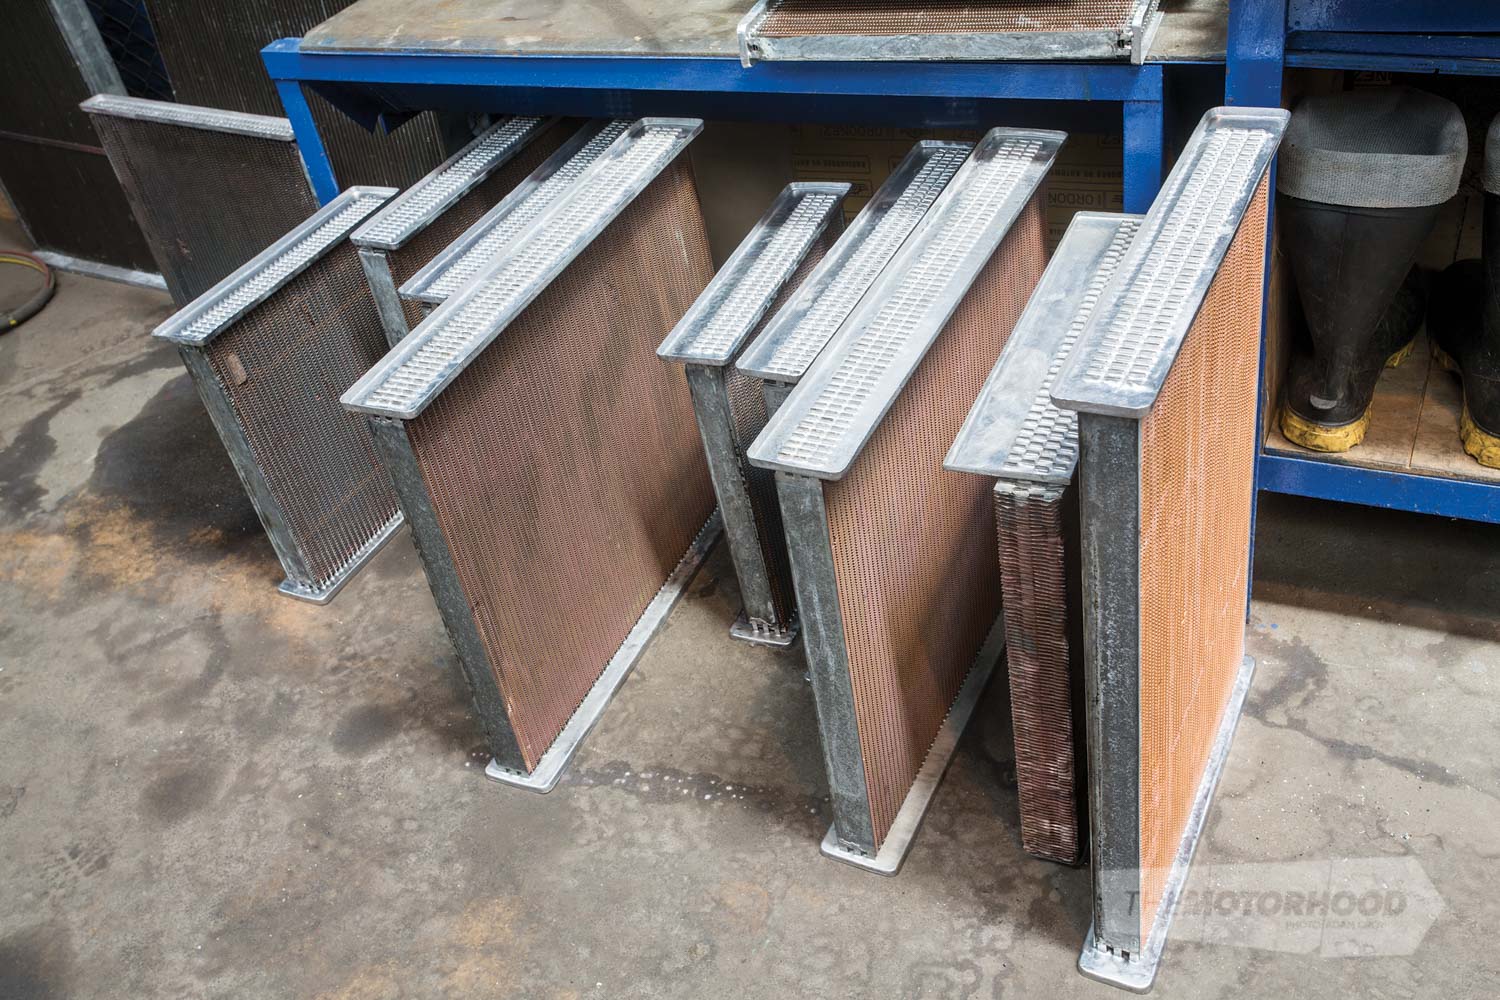
After being dried, the cores are moved to their final quality-control check, when any minor problems are fixed — for example, bent fins are straightened. Once the cores have passed quality control, they are ready to be inventoried or dispatched to the customer.
Vintage-style cores
There’s a little room in Adrad’s facility that deals solely with vintage radiators with either hexagonal (honeycomb) or cellular cores. When Adrad purchased National Radiators 15 years ago, the New Zealand radiator manufacturer had already been going for 82 years. As such, Adrad still has tooling to produce genuine vintage radiator cores. The machines used for each different style are date stamped ‘1914’ — they are real-deal OEM tools from days gone by.
The copper spool is fed into each machine, as it is with the more modern CT fin machine upstairs, and is pressed in the appropriate pattern. The hexagonal style comes out as half hexagons with integrated cooling passages, which are stacked one above the other, making what looks like a honeycomb pattern with water channels within it.
A cellular core is ‘folded’ into itself in an elongated rectangular formation, with a finned insert placed inside. These cells make up the radiator core.
With either style of core, it is common for a template to be provided for the core to fit within.
Since Adrad is one of the few companies that possesses this tooling, there is a huge demand for these products in the US when the dollar is weak. Likewise, whenever MOTAT requires a radiator core, it will be Adrad that comes up with an authentic solution.