
Car electrics can be daunting, but upgrading from a generator to an alternator need not be complicated if you know what pitfalls to avoid
By Jim Richardson
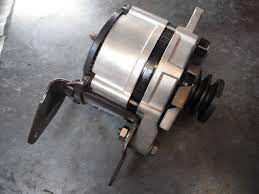
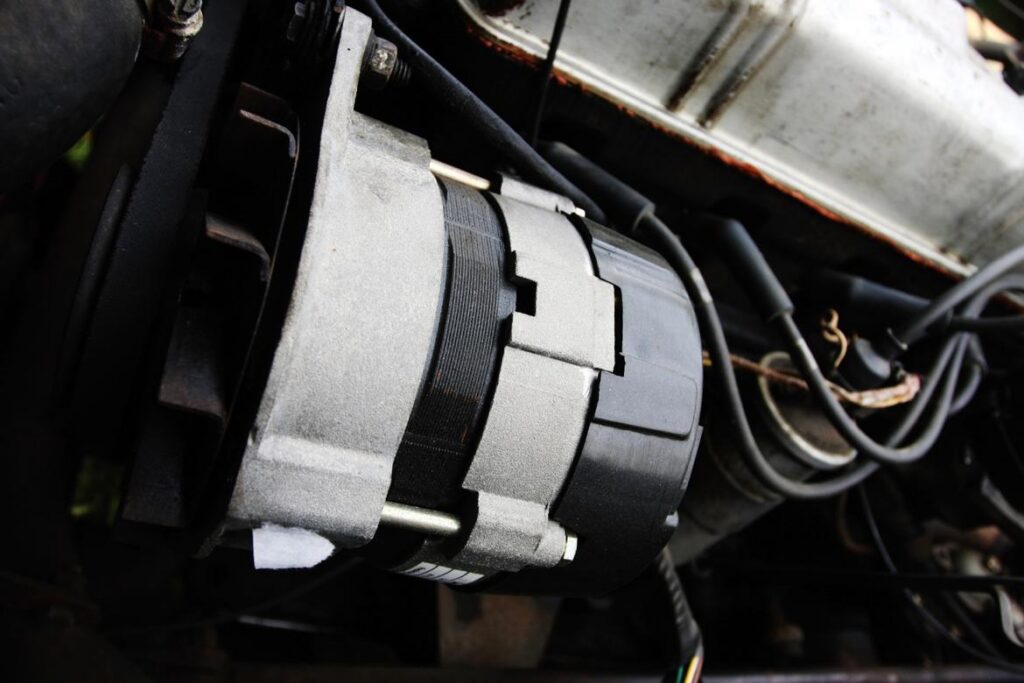
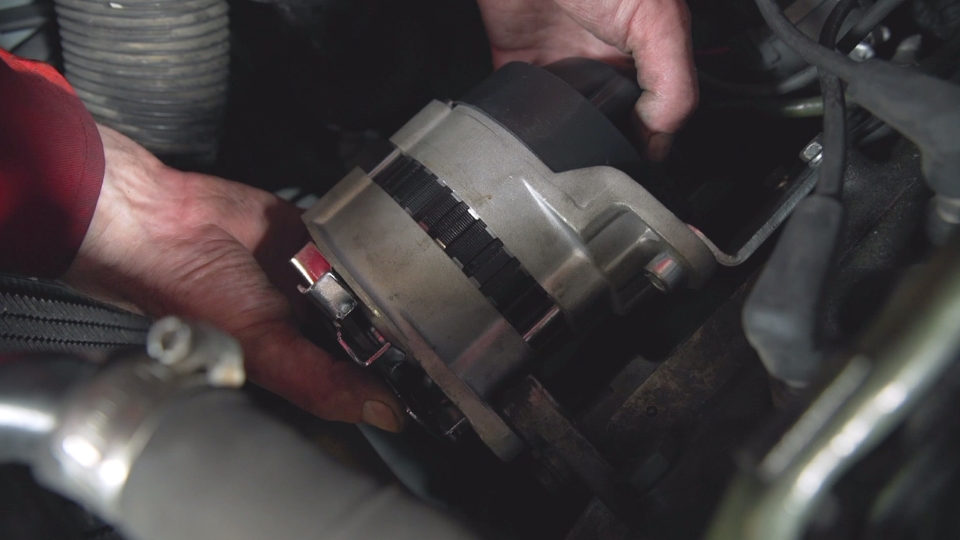
The challenges you may face when converting a 12-volt generating system to an alternator are:
- Finding brackets to mount the alternator to your engine
- Determining the wiring you want to use for your particular set-up
- Deciding whether you want to use an ammeter, an idiot light, or a voltmeter to monitor your classic’s charging system.
Brackets
With recent, more popular classics, brackets to adapt alternators are available from aftermarket sources. In other cases, brackets from more modern cars can be fitted to earlier engines. In a few cases, brackets may need to be fabricated. Just make sure you mount the alternator securely so it won’t wobble and vibrate, and make sure its pulley lines up precisely with the pulley on the water pump and fan, and the vibration damper on the end of the crankshaft that drives it.
If your car is already equipped with an alternator, but it is inadequate for its new job, you can often use the bracket from your original alternator to mount a later, heavy-duty General Motors one-wire alternator. Sometimes the bracket designed for the later alternator can be adapted to your needs, and sometimes a bracket from an entirely different application will do the job. Half an hour spent scrounging around in your local salvage yard will likely yield positive results.
Take a few measurements from your new alternator, figure out the pulley distance required, and measure the diameter and distance between any mounting holes before you set out on your quest for parts. A good place to check for likely replacement candidates is to measure the brackets in later models of your marque. If you still aren’t sure what will work in your case, check with people in the club for your marque to see what they have done.
Wiring
The tools you’ll need are an electrician’s pliers, a sharp knife, electrical tape, and any fittings that may be required. It is also a good idea to have a multimeter on hand to troubleshoot if necessary. Remember to disconnect the battery before doing any electrical work on the car.
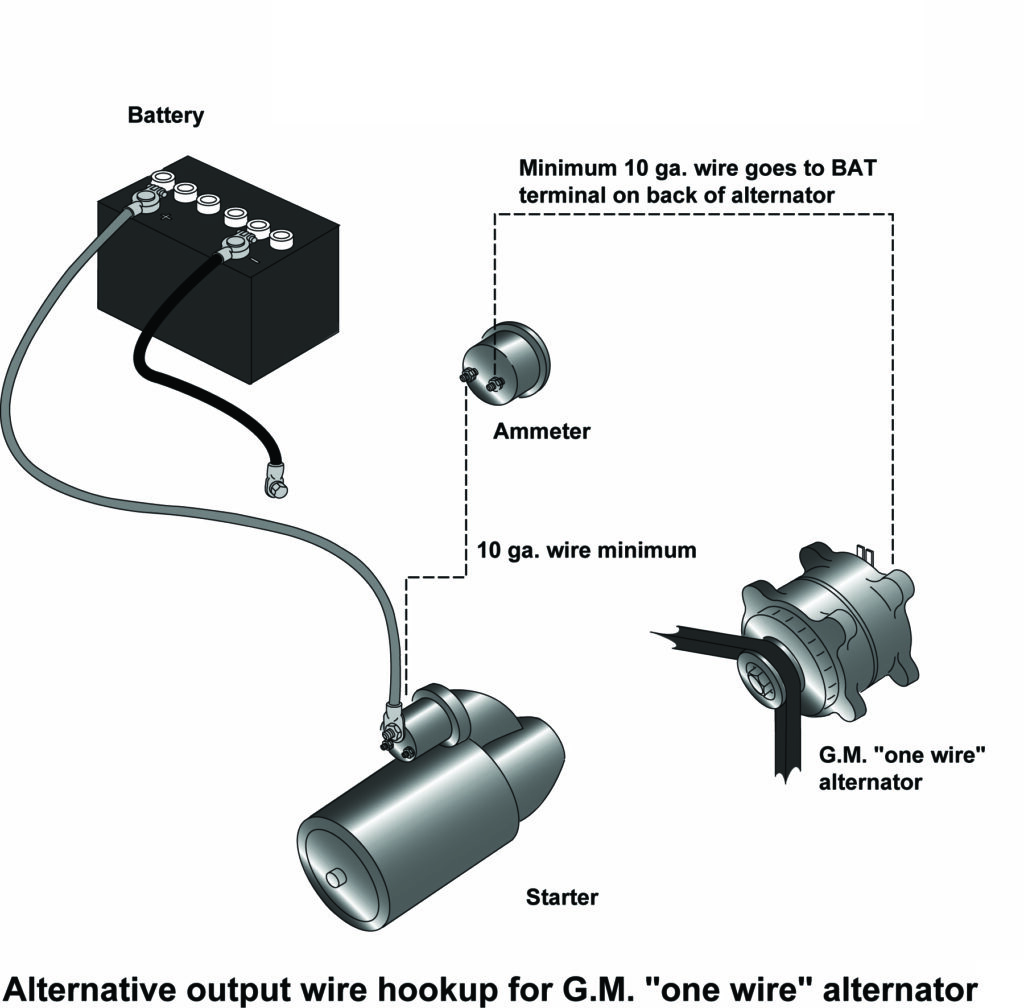
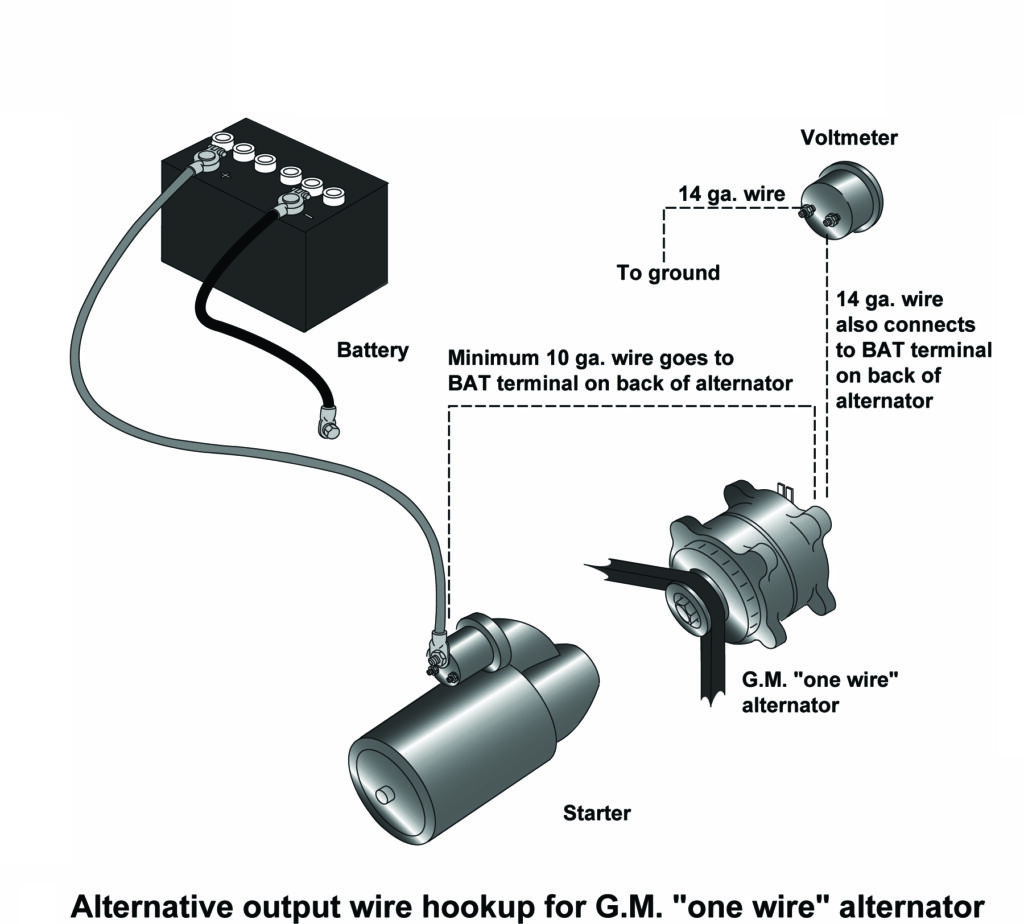
Most old car buffs just use a later GM alternator with an internal regulator – often called a one-wire alternator – when converting from a generator. It is by far the simplest approach. The only disadvantage to a one-wire alternator is that you will not be able to continue using your original idiot light — assuming your car is so equipped — without some rewiring. If originality is not important to you, the simplest answer to this problem is to install an aftermarket ammeter or voltmeter.
Ammeters measure current flow, or amperage, going through the system. They not only tell you whether the generator/alternator is charging, but they can also tell you if there is a current draw from an accessory such as a radio that has been left on. A voltmeter will only tell you whether or not the system is charging.
Current issues
Ammeters require thick wires and are tied directly into the charging system in series, so if you toast an ammeter, your car won’t run. You can take the wires from the left post on the ammeter and attach them to the right post to restore the circuit to get you home, but don’t leave it that way. Instead, get a replacement ammeter because, until you do, you will be flying blind and you could start a fire. On the other hand, voltmeters are only sensors and won’t affect your starting system if they fail. They are also cheaper to make and install, which is why the manufacturers use them in modern cars.
In addition to matching up the ammeter with the alternator, keep in mind that the initial start-up of accessories such as air conditioning and cooling fans can cause a spike of up to 35 amps, so if you add these items to your classic, be sure to install relays to power these components as well. That way, the wire that goes from the accessory terminal on your ignition switch, or from a switch under the dash, to power the accessory just needs to close the switch in the relay to provide power to those high-amp items. The real juice comes directly from the battery to a fuse panel, so the relays just act as switches to complete the circuits on command.
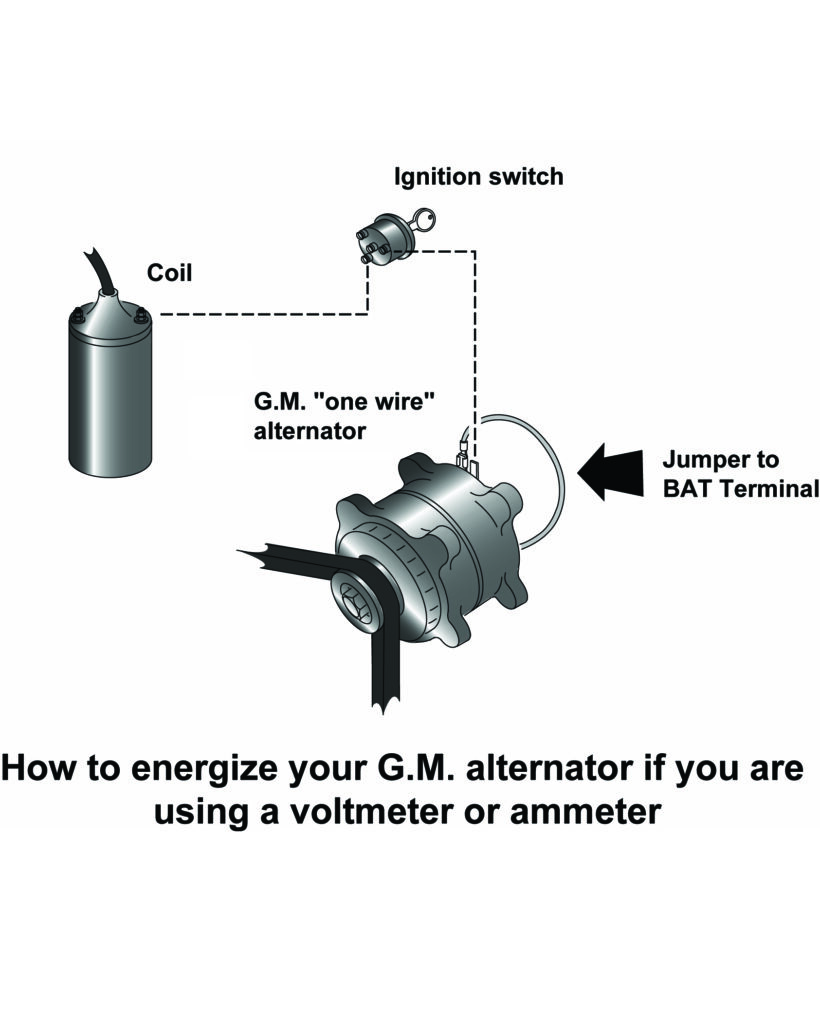
The beauty of an internally regulated General Motors alternator is that you only need to run one wire to the regulator to give it that spurt of juice needed to start your car. Connect that wire to the IGN2 (ignition 2) or IGN3 on your ignition switch — if you take it from the IGN1 terminal, the side to which the coil is attached, the engine will continue to run after you shut the ignition off. Don’t use the accessory (ACC) terminal either. If you do, you will have a problem if you listen to the radio while the engine is not running because the alternator will be live at the same time, so you will very quickly run the battery down.
Dealing with diodes
People have hooked alternators up to the coil side of the ignition switch (IGN1) and then installed a diode on the alternator so the engine can be shut off. A diode is a device that lets electricity flow only one way. The problem with that is that it causes the alternator to overcharge the battery slightly, so it is not the best solution to the problem.
The reason a diode tied into the alternator causes this problem is that there is about a .7-volt reduction across the diode. This means the regulator then sees only 11.3 volts, so it thinks the battery is discharged and starts charging to try to bring it up. As a result, over time this constant charging can boil the battery dry.
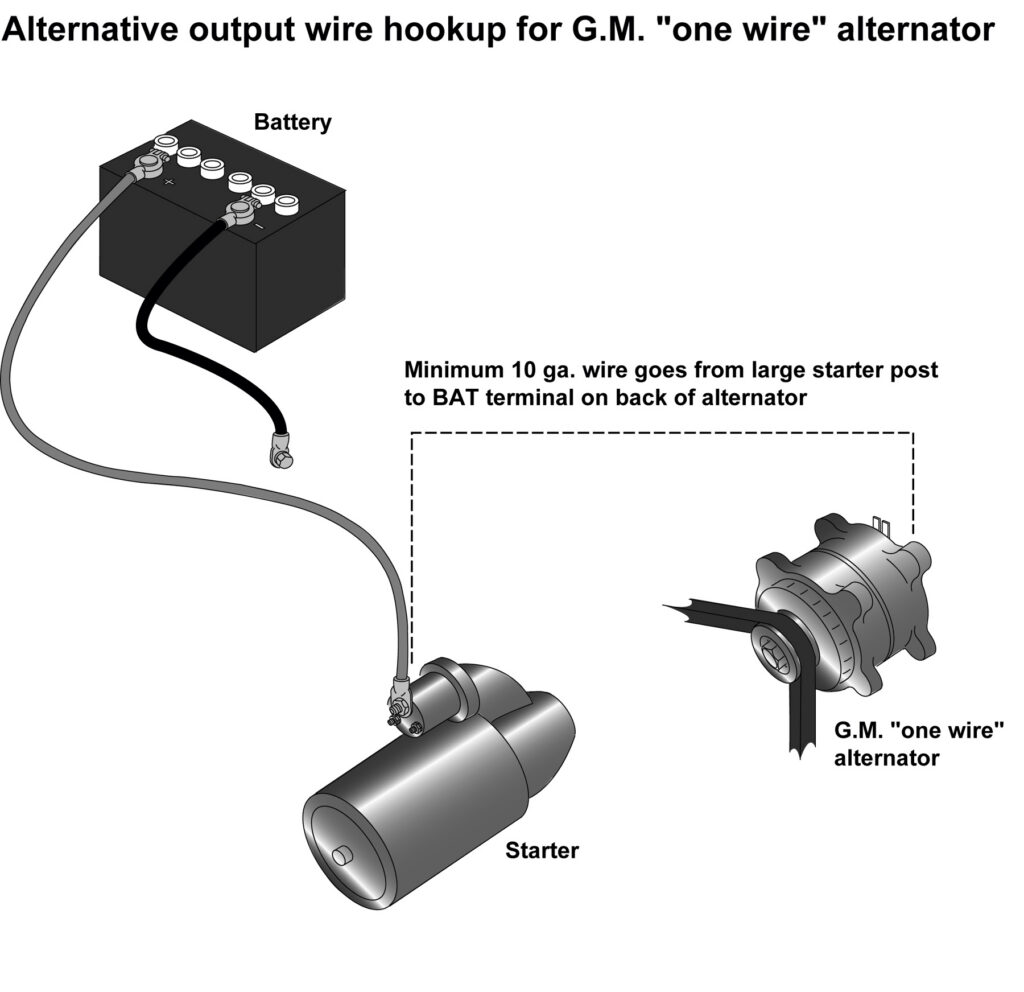
Of course, you can run your alternator from the same post to which the coil attaches, provided you install a warning (idiot) light in series with the ignition switch and the regulator. That way, when the alternator goes south, the lamp will be grounded and will light and let you know something is wrong. Use a lamp socket with two insulated connectors, because neither wire is connected to earth. Run a 14-gauge wire from the ignition switch to the idiot light, and the other to the alternator terminal nearest the output stud (see diagram).
When hooking up a one-wire GM alternator, use a short jumper wire to go from the second terminal on the top of the alternator – the one furthest from the output stud – back to the output terminal (see the diagram for details). A device known as a DA plug, which has two wires coming out of it and plugs into the alternator terminals, can be used for this purpose.
Final checks
Make sure the battery is fully charged, and then reconnect it. If you also installed an ammeter – with the engine off – turn on the headlights and make sure the ammeter shows a discharge. If you get a positive reading, you have the wires reversed on the ammeter. Disconnect the battery before switching them around.
Now, start the car. If you have installed an idiot light, it should burn for several seconds and then go out. If you have installed an ammeter, it should read a positive 10–15 amps for several minutes before returning to zero. If you have installed a voltmeter, it should settle to somewhere around 13–15 volts if you are using a 12-volt alternator with all accessories turned off. If yours reads otherwise, shut the engine off and recheck your work.